
How to Make Great Pizza at Home – The Sourdough Method
This is our “advanced pizza recipe”. This is the one that uses sourdough starter rather than dried yeast and produces a noticeably more complex, more flavourful base with better texture and those characteristic dark blistered spots on the crust that mark a genuinely well-made pizza.
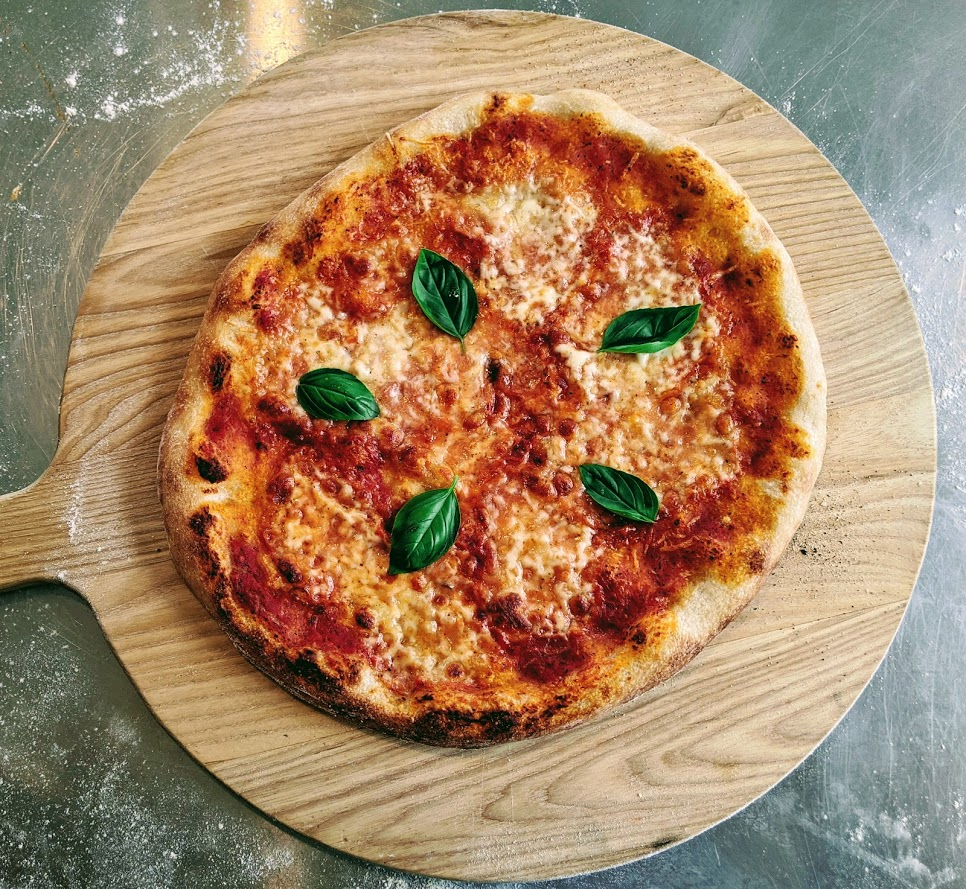
If you’ve made our classic yeast pizza recipe and want to take it further, this is the natural next step. The process takes longer (the proving time is 5-6 hours rather than 1 hour) but the active work isn’t significantly more, and the result justifies the wait.
If you’ve never made pizza at home before, start with the classic recipe first. Come back here when you’re comfortable with the basic technique and want to level up.
Great Homemade Pizza: Sourdough Method
Ingredients
Method
- Combine the sourdough starter, flour, water and salt in a large bowl. Mix until no dry flour remains. Cover with a damp cloth and rest for 10 minutes. This autolyse period allows the flour to hydrate fully and makes kneading significantly easier.
- Knead for 15 minutes by hand until the dough is silky smooth and elastic, or 10 minutes on slow followed by 5 minutes on fast in a stand mixer with a dough hook. The dough should pass the windowpane test – stretch a small piece thin enough to see light through without it tearing.
- Cover and prove for 3 hours at room temperature until noticeably puffed and airy.
- Turn onto a floured surface and divide into 4 equal pieces. Shape each piece into a tight ball by drawing the edges underneath repeatedly, this builds surface tension that holds the shape. Place the balls on a floured tray, cover and prove for a further 2-3 hours.
- At this point the dough balls can be used immediately or frozen. To freeze: place tray in freezer uncovered until balls are solid, then bag up. Remove from freezer in the morning for evening use.
- Crush the garlic and fry briefly in olive oil for 1-2 minutes. Add the tinned tomatoes and oregano, season with salt and simmer for 25-30 minutes until reduced and thickened. Blend smooth with a hand blender. Taste and adjust seasoning.
- Preheat your oven to it's maximum (usually around 250°C) for at least 30-45 minutes with a pizza stone on the middle shelf and a cast iron casserole dish and griddle pan on the bottom shelf. These mass heat sinks prevent heat loss every time you open the oven.
- To shape: press a dough ball flat with your fingers, leaving a thicker rim for the crust. Pick up and drape over the backs of both hands, let gravity do the stretching as you slowly rotate the dough. Work gently, tearing the dough means starting again.
- Place the stretched base on a semolina-dusted thin board or peel. Add a thin layer of sauce, mozzarella and toppings. Less is more.
- Slide onto the hot stone and cook for 7-10 minutes until the crust has dark spots and the base is firm when lifted with a knife.
- Add fresh basil and a drizzle of olive oil after cooking. Rest 2 minutes before cutting.
Notes
- The sourdough starter must be active and recently fed i.e. a starter fed 4-6 hours before use at room temperature should be at peak activity
- If you don’t have a sourdough starter, our classic yeast pizza recipe produces excellent results with much less lead time
- The cast iron heat sink trick makes a significant difference in a domestic oven, don’t skip it
- A thin round chopping board dusted with semolina flour works as an effective pizza peel if you don’t own one
Do You Have a Sourdough Starter?
This recipe requires active sourdough starter. If you already maintain one, use it fed 4-6 hours before you want to make pizza as it should be at peak activity, domed or just starting to fall, with visible bubbles throughout.
If you don’t have a starter, there are four routes open to you:
Make your own. Combine equal weights of flour and water in a jar, feed daily for 5-7 days and a wild yeast culture establishes itself naturally. Many guides exist for this process and it’s genuinely simple, just slow.
Get some from a friend or baker. Sourdough bakers almost always have surplus starter they’re happy to share. A tablespoon is enough to get going. Many artisan bakeries will give you some if you ask.
Buy Starter online. You can now buy sourdough starter online from Amazon. Its a great way to get going with your own starter.
Use the yeast recipe instead. Our classic pizza dough recipe using tipo 00 flour, semolina and dried yeast produces genuinely excellent pizza. If you want great homemade pizza tonight rather than a project, start there.
Why Sourdough Makes Better Pizza
The difference between a sourdough pizza base and a dried yeast base is noticeable and comes down to two main things:
Fermentation time. The long slow prove (5-6 hours rather than 1 hour) allows organic acids to develop in the dough, the same acids that give sourdough bread its characteristic flavour. These acids make the base more complex and interesting than a quickly proved yeast dough.
Wild yeast activity. Commercial dried yeast is a single strain selected for reliability and speed. A sourdough starter contains dozens of different wild yeast strains plus beneficial bacteria, all contributing different flavour compounds. The result in the baked dough is more complex and has better depth.
The practical difference: a sourdough pizza base has a slightly tangy edge, a more open crumb structure in the crust and better blistering. Once you’ve eaten it you notice the flatness of a commercial yeast base in comparison.
The Dough: Technique Details
The autolyse rest. After combining the ingredients, the 10-minute rest before kneading makes a significant practical difference. During this time the flour hydrates fully and the gluten begins to develop without any work from you. The dough goes into kneading already partially developed and the 15 minutes of work produces a noticeably smoother result than skipping the rest.
Kneading. 15 minutes by hand or 10+5 in a stand mixer. The test for sufficient kneading is the windowpane test: take a small piece of dough and stretch it gently. If it stretches thin enough to see light through without tearing, the gluten is sufficiently developed. If it tears quickly, keep kneading.
Shaping the balls.This step makes a significant difference to how the pizza stretches later. To shape: take one piece of dough and fold the edges underneath repeatedly, turning the ball as you go. The aim is to build surface tension in the outer skin of the ball. A properly shaped dough ball holds its round shape cleanly on the tray. A poorly shaped one spreads into a flat disc — and when you try to stretch it into a pizza base it tears rather than extending smoothly.
Freezing dough balls. One of the most practically useful aspects of this recipe. Make a double batch, use half immediately and freeze the rest. Take frozen dough balls out of the freezer first thing in the morning and by evening they’re thawed and ready to shape. The quality after freezing and thawing is essentially identical to fresh.
Heat: The Domestic Oven Problem and How to Fix It
Wood-fired pizza ovens operate at 400-500°C and cook a pizza in 90 seconds. Domestic ovens typically max out at 250-280°C. The lower temperature means longer cooking time. The longer cooking time means the base dries out rather than blistering, the cheese overcooks before the base is done, and the result is good rather than spectacular.
The two tricks below significantly close this gap:
The cast iron heat sink trick. This is the single biggest improvement you can make to pizza cooking in a domestic oven. Place a heavy cast iron casserole dish and a griddle pan on the bottom shelf of your oven during preheating. These heavy metal objects absorb enormous amounts of heat during the 45-minute preheat. When you open the oven to load or remove a pizza, the air temperature drops — but the thermal mass stored in the cast iron releases heat back into the oven almost immediately, dramatically shortening the recovery time between pizzas.
Without this trick, the oven takes 5-7 minutes to recover its temperature after each pizza. With it, recovery is much faster and every pizza cooks at close to the oven’s maximum temperature.
The pizza stone. Preheat the pizza stone on the middle shelf for the full 45 minutes. A cold stone produces a pale, slightly doughy base even in a hot oven. A properly preheated stone produces a base that crisps from underneath as well as cooking from the hot oven air above. This is what distinguishes restaurant pizza from most home attempts. You can pick up pizza stones on Amazon.
Stretching the Dough: The Gravity Method
This is the technique that most home pizza makers don’t use and should. Rather than rolling the dough out with a rolling pin (which compresses the gas out of the dough and produces a dense base) the gravity method stretches it while preserving the airy structure.
Take your dough ball and use your fingers to press it flat on the work surface, starting from the centre and working outward. Leave a thicker rim around the edge, this is where the crust will form and puff up during cooking.
Once the base is about 20cm across, pick it up. Drape it over the backs of both hands. Let gravity pull the dough downward as you slowly rotate your hands, the dough should stretch outward under its own weight. Work gently and consistently. If the dough starts to resist and spring back, set it down for 2 minutes and let the gluten relax before continuing.
The aim is approximately 30cm diameter, as thin as possible without tearing. A slight unevenness in thickness is completely fine, it produces the irregular blistering pattern of a hand-stretched pizza rather than the uniform look of a rolled one.
The Pizza Sauce
This article uses a slightly different sauce approach from our dedicated spicy pizza sauce recipe, the sourdough base has more flavour than the yeast version, so the sauce can be simpler without losing anything. Tinned tomatoes, garlic, oregano, reduced well, blended smooth.
For a spicier sauce with more complexity (particularly good with the salami and chilli topping) use our spicy pizza sauce recipe instead. The chilli-simmered passata version works beautifully with the sourdough base.
The Chilli King’s Favourite Topping (Salami and Chilli)
A sourdough base handles bold toppings better than a yeast base, the complexity of the dough holds its own against strong flavours rather than being overwhelmed.
The personal favourite: thin slices of spiced Italian salami (Napoli or Milano) with finely sliced fresh red chilli scattered over the mozzarella before cooking. The salami crisps slightly at the edges, the chilli chars lightly on top of the cheese, and the fat from the salami melts into the sauce during the seven minutes of high heat. Add a drizzle of our homemade chilli oil over the finished pizza immediately before serving.
Getting the Pizza In and Out of the Oven
Without a proper pizza peel the loading and unloading process is the most awkward part of home pizza making. The solution that works well without specialist equipment:
Loading: Build the pizza on a thin round chopping board or flat tray well dusted with semolina flour. The semolina acts as ball bearings, the pizza slides freely rather than sticking. Slide directly onto the stone.
Unloading: Fish the pizza out using a large chef’s knife slid under the base. Because the base goes crispy during cooking it holds its shape and slides off the stone cleanly onto the board. This works well and means you don’t need to buy a peel.
If you make pizza regularly, a pizza peel is worth investing in as the long handle keeps your hands away from the very hot oven and makes loading significantly easier. We have one hung on the kitchen wall at all times!
How Do You Know When It’s Done?
The crust should have dark spots, not uniformly golden but with genuine black or very dark brown patches where the dough has blistered. This is what you want. Pale uniform golden crust means the oven wasn’t hot enough or the stone wasn’t preheated long enough.
The base should feel firm when you lift one edge with a knife, not floppy or drooping. A drooping base needs another 2 minutes.
The cheese should be fully melted, bubbling and starting to colour at the edges. Any unmelted patches suggest the topping layer was too thick or the mozzarella was too wet.
In most domestic ovens at maximum temperature with a properly preheated stone, 7-8 minutes is about right. But ovens vary and the first pizza of any session is the test. Adjust timing based on what you see.
FAQ
I don’t have sourdough starter. Can I still use this method?
Without sourdough starter this specific recipe doesn’t work, the starter is the leavening agent. Our classic pizza dough recipe using tipo 00 flour and dried yeast is the alternative and produces excellent results. Come back to this one when you have a starter established.
How active does the starter need to be?
Very active. Feed your starter 4-6 hours before making the dough. It should be domed or just past peak, with visible bubbles throughout and a tangy smell. A recently unfed, sluggish starter produces flat, dense pizza base. If your starter sinks to the bottom of a glass of water rather than floating, it needs more feeding before use.
Can I leave the dough balls overnight?
Yes. Put the shaped balls in the fridge after shaping rather than leaving at room temperature for the second prove. They’ll prove very slowly overnight in the cold. Remove from the fridge 1-2 hours before using. This extended cold prove improves flavour further.
Why does my pizza stick to the stone?
Either the peel or board wasn’t dusted generously enough with semolina before building the pizza, or the pizza sat on the board for too long before loading (the base absorbs moisture and sticks). Build quickly and load immediately. Generous semolina is the key.
My crust is pale not blistered. What went wrong?
Either the oven wasn’t hot enough, the stone wasn’t preheated for long enough, or the pizza was too thick. The oven needs to be at its absolute maximum with the stone inside for the full 45-minute preheat. Don’t rush this, it’s the most important preparation step.
Can I use plain flour instead of strong bread flour?
For this sourdough version, strong bread flour (higher protein content) gives significantly better results than plain flour. The strong flour produces a more elastic gluten network that handles the long prove and gravity stretching without tearing. Plain flour can work but the results are noticeably inferior.
Our Pizza Recipes and Guides
The Perfect Pizza Recipe — the accessible version using tipo 00 flour and dried yeast. Start here if you’re new to homemade pizza — the cold prove option makes the dough surprisingly complex in flavour.
Spicy Pizza Sauce Recipe — our chilli-spiked tomato sauce made with fresh chillies, passata and basil. Better than shop-bought and ready in 20 minutes.
Sweet Chilli Sauce Recipe — drizzle over the finished pizza for a Thai-inspired sweet heat dimension. Particularly good with salami.
Homemade Chilli Oil — the finishing touch for any pizza. Made with dried chillies, ready in 20 minutes and keeps for months.
Scotch Bonnet Sauce — for those who want serious heat on their pizza rather than background warmth.
Wow this looks amazing. I’m definitely going to try the cast iron pan trick. That pizza looks great!