It seems like I’m forever watering my plants or worrying about if they’re drying out while I’m at work or away for an odd day or two. In fact it is the bain of my gardening life.
A while ago now I posted about how I’ve built some self watering pots to use over the summer months when my chilli plants are more mature. However now I have a large population of chilli seedlings I’ve remembered that the watering problem is even worse when plants are smaller. Not only do the small pots dry out quicker but the tender plants/seedlings in them are much more vulnerable to variations in conditions compared to established plants.
So at the weekend I got my thinking cap on and decided to come up with an effective self watering system to use with young plants and seedlings.
My Self Watering System for Seedlings
At the heart of the system I came up with is the use of the ever useful capillary matting. When raising seedlings my father always has a large tray on the bench of his greenhouse with a layer of capillary matting placed in the bottom. He simply puts the plastic plant pots on top and waters the matting in the bottom of the tray twice a day.
The soil in the bottom of each pot is kept moist by the wet matting underneath each pot. A key benefit of this watering from beneath is that the plants are encouraged to grow strong roots as they grow downwards in search of the moisture.
The problem I had to solve with the above system was how to keep the capillary mat moist at all times and remove the need to water it twice per day (or more in mid summer). The solution I came up with is pretty simple.
After reading this article about using sunken terracotta pots buried in larger pots or beds I decided that using a terracotta pot might be the answer. They work well as water reservoirs due to the fact that they are semi permeable to water. If you fill a terracotta pot up with water, it will very slowly leach out of the pot over the period of a few days.
First take an unglazed terracotta pot and filled in the small hole in the bottom with some regular kitchen/bathroom sealant. Next simply stand the terracotta pot on the matting alongside the rest of the plants and fill it with water.
Because the terracotta is porous, moisture will be sucked out of the water reservoir through the terracotta pot making the mat wet once again. Here’s a quick sketch of what the finished result looks like:
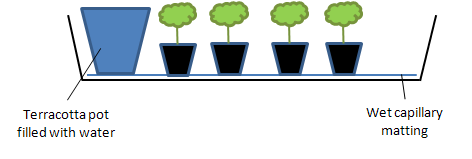
Like all good DIY projects this one is incredibly simple and cheap to make. The simplicity means there is not a huge amount that can go wrong with the system. So long as you are careful to fully seal the hole/s in the bottom of your pot and you terracotta pot is sufficiently porous (i.e. unglazed) then nothing can go wrong.
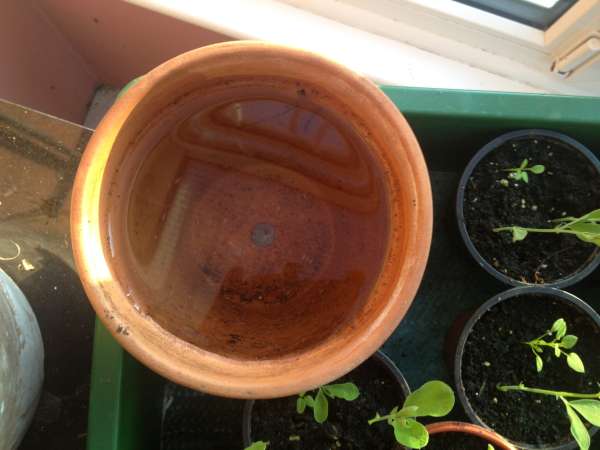
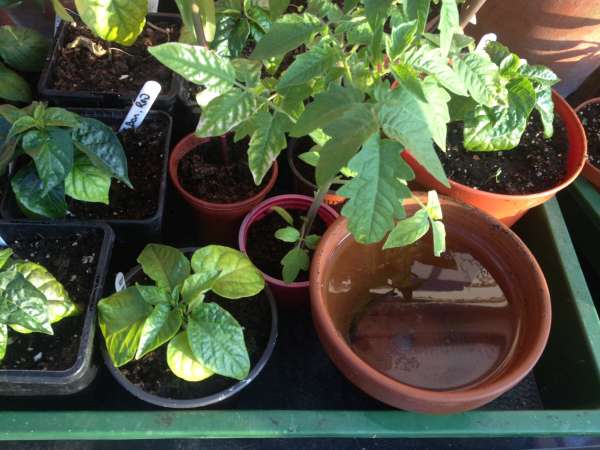
In order to prevent algae forming in the water reservoir I usually place a plant pot saucer over the pot to keep the light out. All I now have to do is check the water level inside the terracotta pot every few days and top it up as necessary.
From my experience, chilli plants love consistent conditions. When conditions (heat, light, moisture etc) change it places stress the plants which invariably causes growth to slow, foliage to be damaged and a reduction in your eventual yield. Like all self watering systems this method allows a constant supply of water to the roots meaning there is one less variable for you to worry about.