≡ Menu

Every year around this time I always seem to have the same problem…what to do with my chilli plants when I’m away on holiday?

This year was no different. No sooner had a planted my super hots and got a decent crop of tender seedlings growing when all of a sudden it was time to head off to somewhere warm and sunny for two weeks, abandoning my crop.

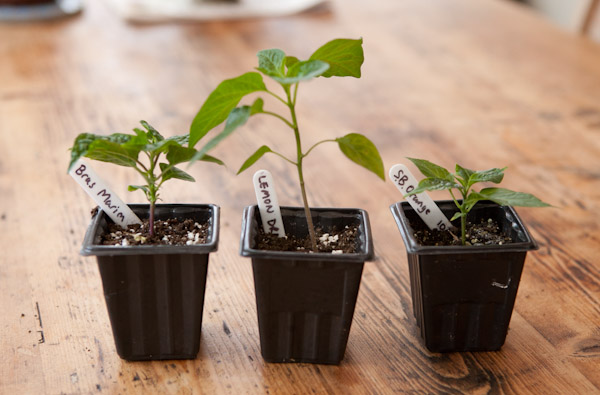
Luckily for me my father was willing to shoulder the responsibility of nurturing my seedlings in his grow box (which is a replica of the one I used to use). Well it’s been an extra week either side of the holiday and so a total of 4 weeks since I last saw the first of this years crop.

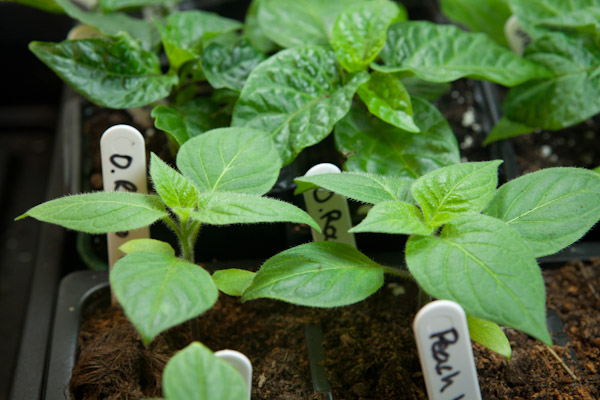
I’m pleased to say that the plants have been doing great since I dropped them off. They’ve been held at a steady 20 degrees Celsius and been given almost 24/7 light! As you can see the foliage on most of the plants is looking incredibly lush and the growth has been very compact on most of the plants.

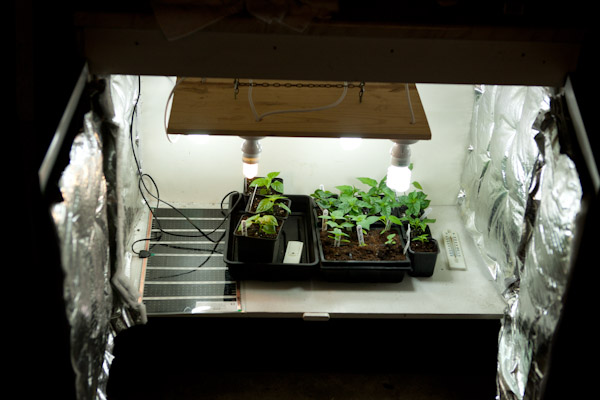
I’ve now got the plants set up inside my new grow cupboard. So far it’s performing really well. It’s in an unheated shed that bears the brunt of the cold wind and despite the near freezing temperatures outside last night it was holding just under 19 degrees inside under the lights.

Hot PeppersIn the Grow BoxOrange RocotoIn the Grow Box2

Meanwhile it is high time I got some annuum varieties sown. I started off last night by planting a load of Apache’s. I’l add to this over the next few days with some other varieties. All we need now is for some decent weather to finally appear so Spring can get underway once and for all.

0 comments

After many years of growing chillies it’s become a habit to use artificial lighting early in the year to start my seedlings before Spring arrives in earnest. For the last few years I’ve mainly been using my old grow box which has been cluttering up the house every year for far too long. After a few years of good service the light fittings were on their way out after being dropped too many times so I decided it was time to find a replacement.

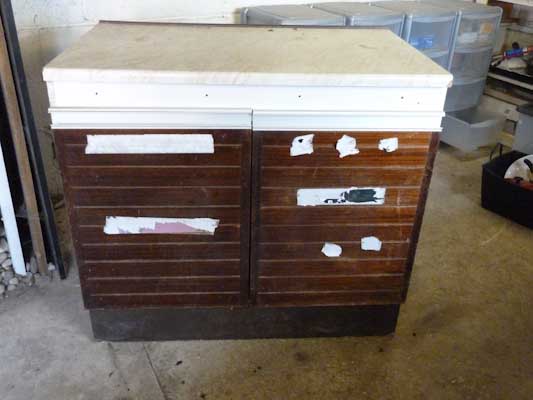
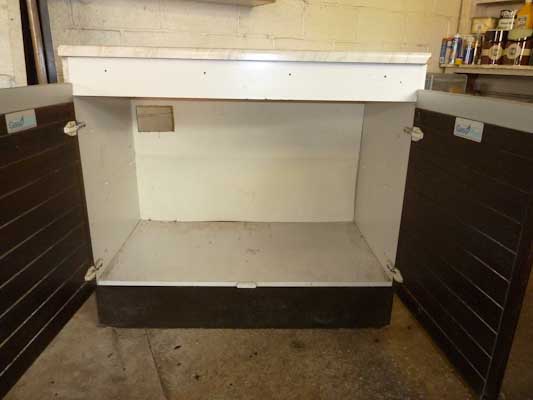
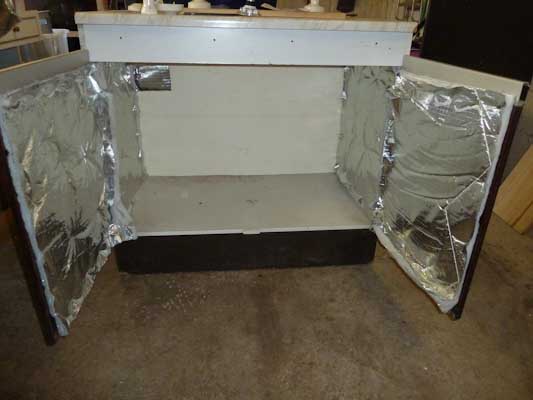
While there are some very nice looking grow tents on the market I opted to try and repurpose as much of the junk in my shed as possible first and only resort to an off the shelf option as a last resort. I soon identified an old kitchen unit which is currently used to store junk. After not much thought the junk was swiftly relocated and the inside shelf removed… Double Cupboard Perfect for A Grow Box Double Cupboard Inside   After a quick wipe down it was looking pretty ideal as a grow cupboard. It could live where it was and would be able to house plants up to about 50cm high. I’m not planning on keeping my pepper plants in here through to the fruiting stage. I only plan to use it to bring on seedlings with the help of CFL or maybe LED lights until the weather is warm and sunny enough for the plants to either go outside or into the greenhouse.

The Plan

The idea is to leave the grow box down in the shed so I’d ideally need some insulation to keep the heat inside. Another definite requirement was the ability to adjust the height of the lights inside, something missing from my old box. In order to power the lights, my heat mat etc I’ll need some sort of power supply in or near it. Apart from these requirements I decided to let it evolve based on what I found in the shed.

The Insulation

The grow box will be positioned out in the shed which is of course unheated. I plan on using a mixture of CFL lights which give off a small amount of heat and I’ll probably use the cupboard to germinate seeds with a little help from my germination mat.

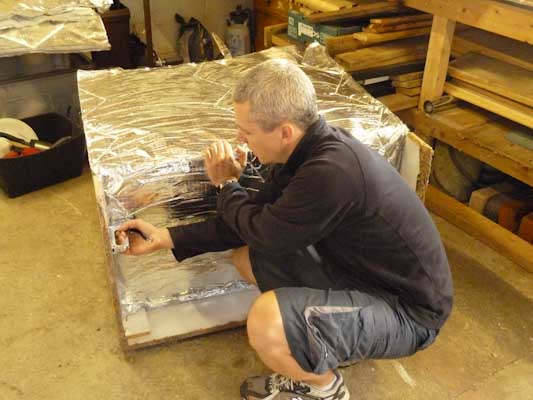
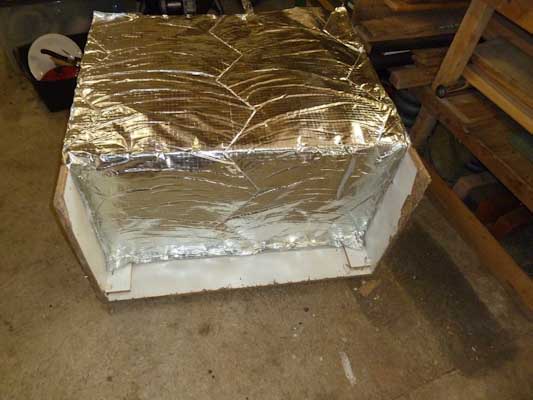
To help keep growing temperatures up high i decided to use some old loft insulation to insulate the base and back of the cupboard. I forget the name of the insulation but it is ultra thin (about 2cm) and made up of about 10 layers of aluminum and fiber glass webbing stitched together.

Grow Box Insulation Back Me Grow Box Insulation Back Grow Box Insulating the Inside With the bottom and back insulated I also decided to do the inside the doors and sides of the cupboard to help cut down on any heat loss and drafts. The silver coating on the insulation is a bit of a bonus as it will hopefully help reflect the light around inside the box to ensure the plants get the most benefit from any lights in there. Up in the top left of the box I cut out a small square so I can run cables through for the lights and heat mat. Depending on what temperatures I get I may also have to add a small fan at some stage. So with the box fully insulated it was ime to think about lighting.

The Lights

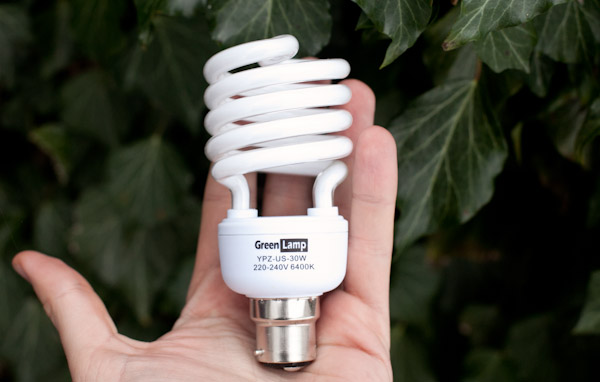
The bulbs I’ll initially be using in the grow box are 30W Compact Fluorescent bulbs from Green Lamp via Amazon. They are slightly more powerful than the average CFL energy saving bulbs (which are typically 11W) so should be ideal for my chilli plants. Each bulb throws out the equivalent light to a 150W incandescent bulb. The advantage of these CFL bulbs is that they are cheaper to run than regular bulbs and they don’t bleed energy in the form of heat which can easily scorch young tender seedlings.

30W CFL Grow Light

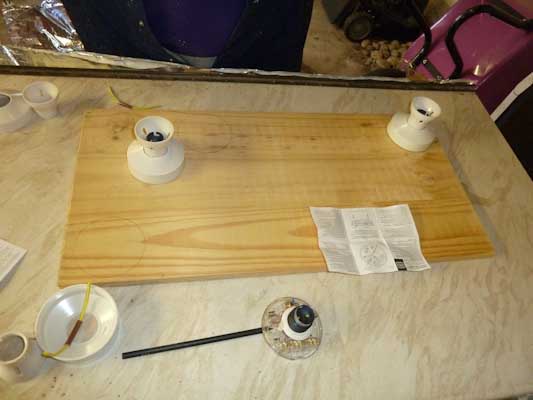
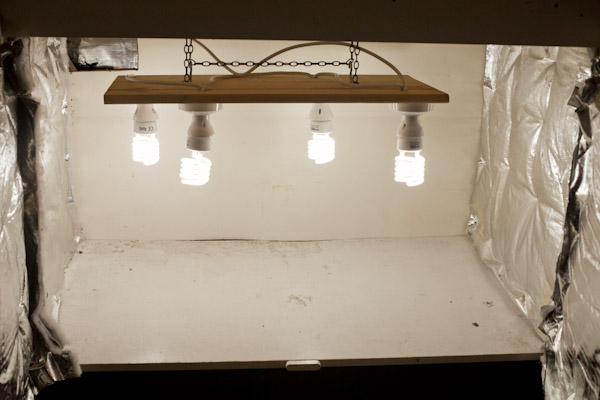
I decided to mount 4 of these onto a light weight pine board which will allow me to adjust the lights up and down according to the height of the plants inside. After deciding on the placement of the bulbs I marked round them with a pencil before cutting a couple of holes in each for the wires.

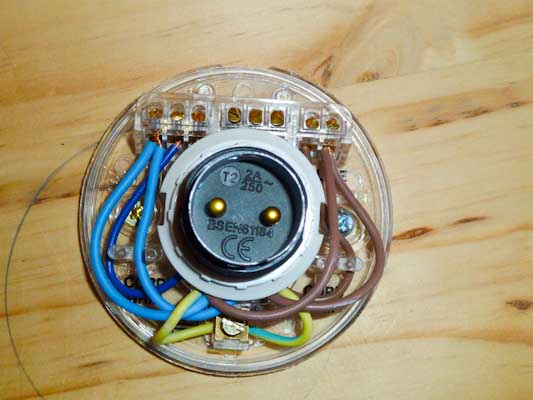
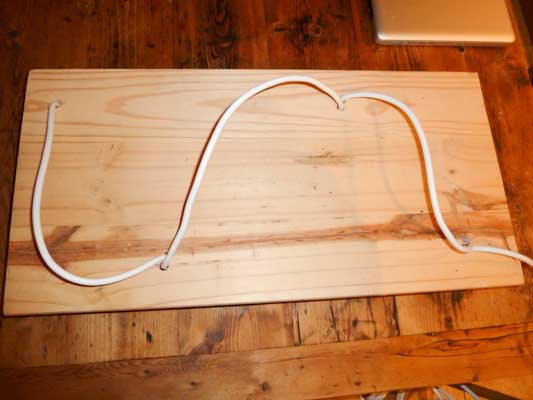
Grow Box Lighting Rig Grow Box Lighting Wiring Lighting Wiring

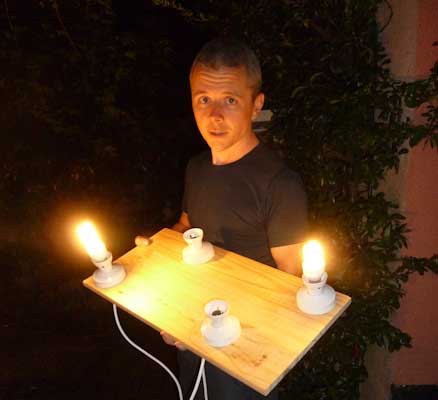
The wiring took a while to do but was relatively simple to do with each fitting wired up in a line next to each other. I took my time and opted to keep all of the wiring on top of the light rig out of harms way. This meant a bit more drilling and took a bit longer but would ultimately lead to a neater job. After a good half an hour it was time to test my electrical skills….

Testing the Grow Lights

The Hanging System

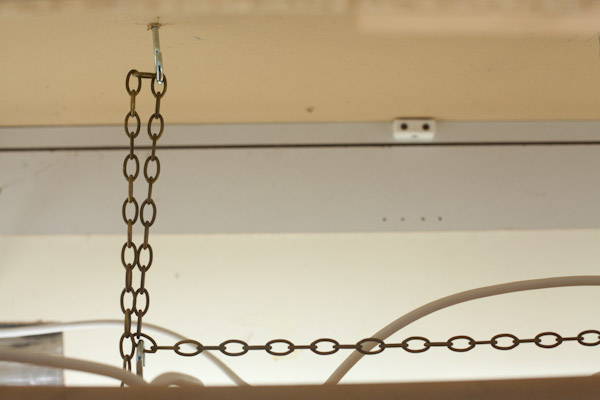
So fully tested it’s time to mount the lights inside the cupboard. I’ll probably experiment with using both these regular domestic CFL bulbs (x4) and my old 125 Nurturlite so I need a flexible hanging system to allow me to easily swap out the lights. After a quick rummage in the shed I found a length of chain and some sturdy metal hooks. I simply screwed two hooks on to the ‘ceiling’ of the cupboard and a couple to the top of the light rig. I then run the chain in a U shape through all of the hooks to hang the rig. The beauty of using this chain system is that it is very quick and easy to adjust the height of the lights or remove the whole rig if I want to put my Nuture light in there at some stage.

Light Rig Hooks

And so for the cost of the 4 bulbs, 4 light fittings and a few bits and bobs lying around in the shed I’ve got what I hope to be a pretty good little grow cupboard…

Chilli Grow Box

So this weekend I’ll be moving some of my seedlings into their new home. As with using any propagator, grow box or tent I’ll be using a thermometer to keep track of the temperatures inside and gradually build up the time the lights are left on so as not too burn any seedlings.

1 comment

I mentioned some time ago I was thinking of building my own self watering planter. For one reason or another the project never got past the planning stage and then father christmas bought me some Quadgrow self watering planters. I was very impressed with the Quadgrows with all the plants using them outgrowing the normal potted planted significantly (check out my full review of these here).

So with the help of my father I thought I might try to make some smaller diy self watering pots that I could dot around the garden this summer.

The varieties I’ll be growing outside this summer will mainly be C.Annumns and C.Pubescens that tend to grow quicker and tolerate the outdoor weather better than some of the other varieties. Hopefully by growing some of these in self watering pots their growth can be maximized further allowing a harvest not too far of what I’d expect were they to be grown under glass.

Materials (for each container)

  • 2 x black plastic pots
  • 32mm drain pipe
  • duct tape
  • capillary matting

The pots were bought from Morrisons supermarket – they sell off the old pots their cut flowers come in for £1 for 8 pots which is very reasonable. Any pots would do however they must not have holes in the bottom as the water reservoir will be sitting in the bottom of these.

All of the other bits I managed to find lying around the shed so the total cost for each pot came in at about 25 pence each!

The Build Process
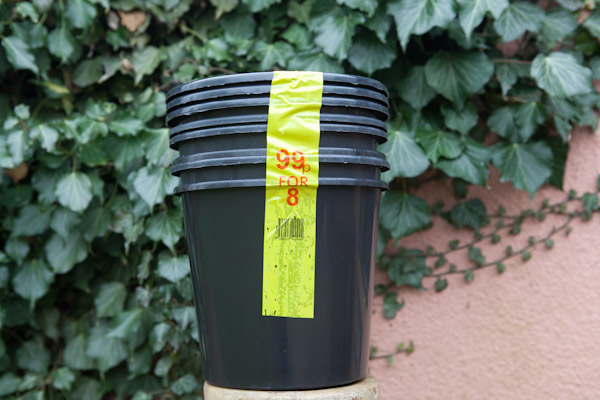
plant pots from morrisons Mark the Pot

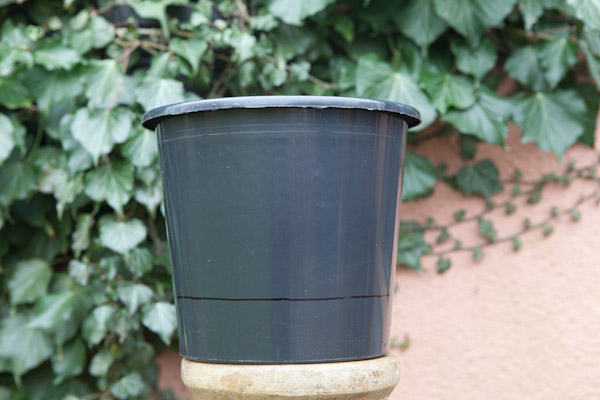
First I marked 2 inches up around the base of one of the pots and with a Stanley knife, carefully cut round the mark. This was quite tricky as the pots are quite thin and prone to splitting. Turned upside down and placed inside the pot this 2 inch part will form the barrier between the water reservoir and the soil above.

Of course the top of the pots is slightly wider than the bottom so when you try to put the barrier in the bottom of the pot it is slightly too big. To help make it fit I cut 3 vertical slits into the walls, almost to the bottom. This ensures a good fit into the outer pot.
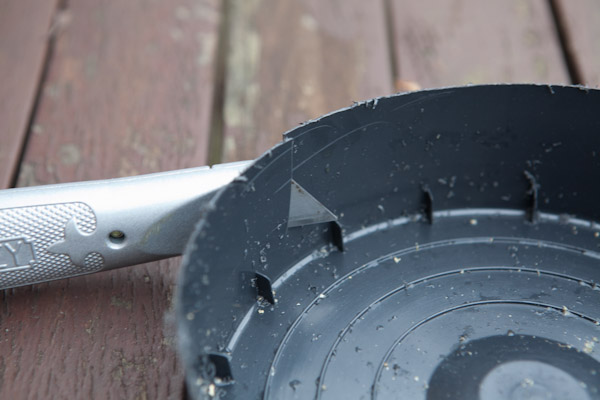
Slots

Next I cut two holes into the bottom of the raised base – one for the watering pipe and one for the wicking membrane (capillary matting) to push through. The hole for the pipe (near the edge of the circle) was 32mm while the wick hole (near to the center) was about 18mm.
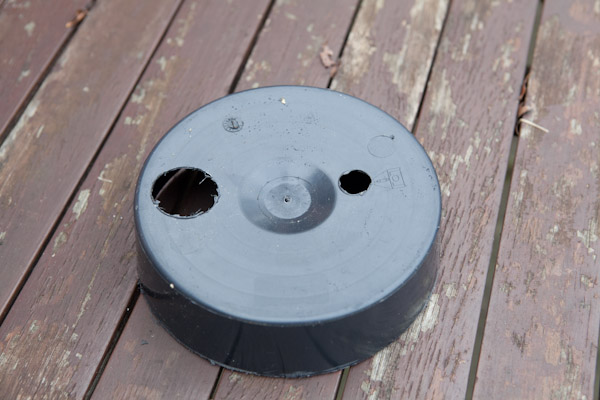
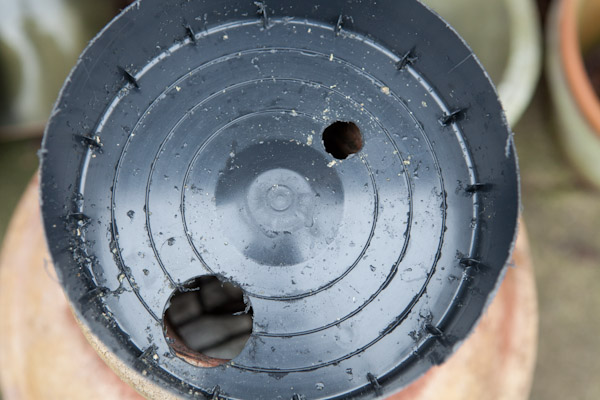
Cut the holes-2 Cut the holes

For the wick I just cut a rough triangle from regular capillary matting about 25cm in length. The thick end will sit in the water reservoir while the narrow end will poke through the small hole in the barrier up nto the compost above. As i learned from the quadgrow last year the plants roots will quickly grow around the wick sucking up the moisture as and when they require it.
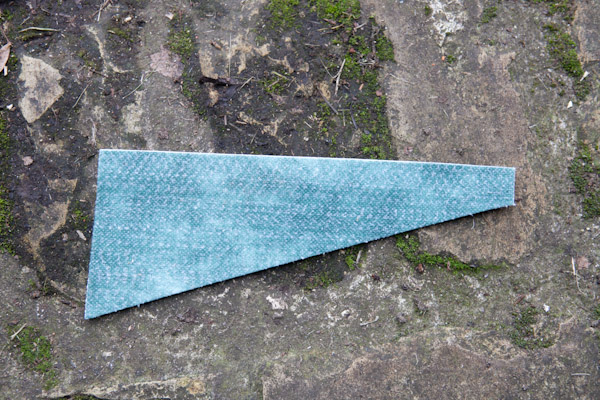
wick

After cutting the length of pipe to 25 cm I assembled the wick and the pipe into the base. To stop compost falling down into the water reservoir I added a bit of duct tape around the bottom of the pipe. Here’s how it looked assembled ready to be put into the main pot.
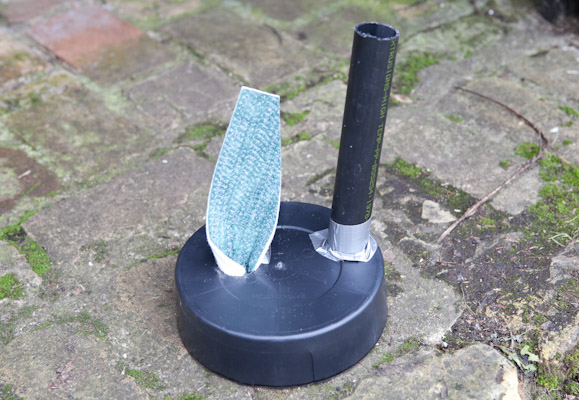
Self Watering Pot

Before I the final assembly I cut a couple of small grooves into the bottom of the pipe. This will make sure the water can get through into the reservoir just incase the pipe is sitting too flush on the bottom of the outer pot.
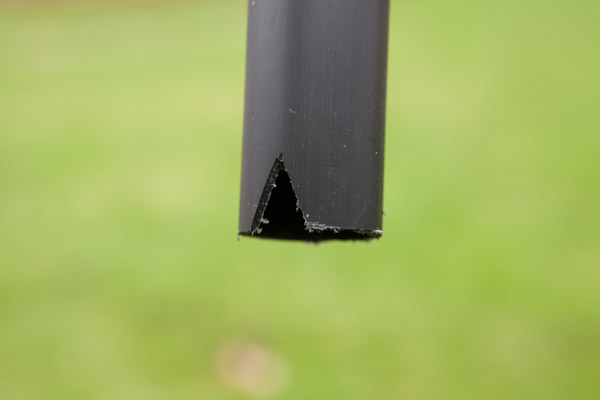
Groove

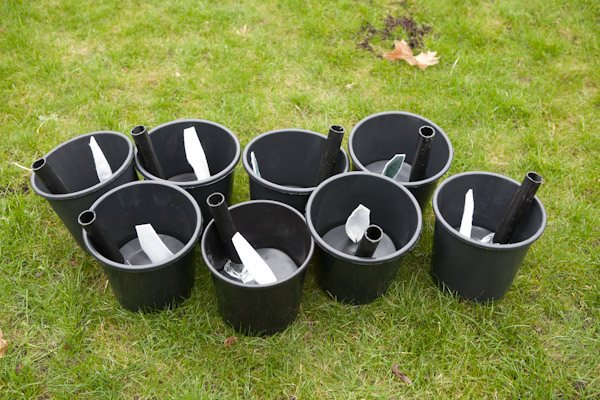
So, after fully assembling the pots here is how they look….
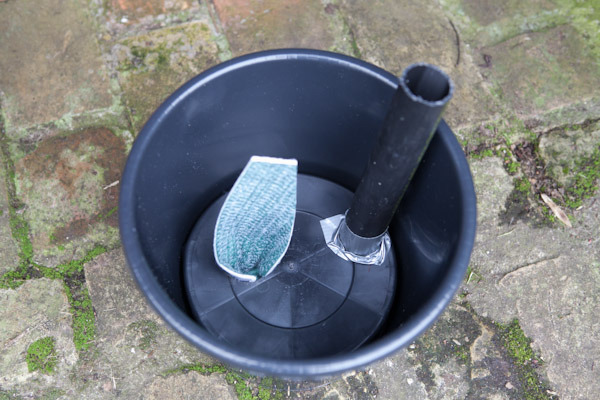
I cut a couple of small grooves in to the bottom of the pipe to make sure the water can get through into the reservoir incase the pipe was sitting too flush on the bottom of the outer pot.Self Watering Pots

I’m pretty pleased with how they came out. They’ll certainly help to prevent any pots drying out IF we get a nice hot summer this year. As with the Quadgrows I’ll use some nutrients mixed in with the water – most likely a liquid tomato feed at half the recommended strength.

Once I start using them and the chilli plants are in place I may cover the top of the compost with black plastic to help prevent losing moisture via evaporation…I’ll let you know if I get around to that one!

Update: Since writing this post I’ve made two adaptions to this design:

Update 1) I’ve drilled an overflow hole in the side of each pot level with the top of each of the water reservoirs. This will prevent me from overfilling the reservoirs and water logging the roots.

Update 2) I’ve drilled lots of (about 10-15) small holes in the top of each of the reservoir lids. This is to help aerate the roots and again prevent water logging.
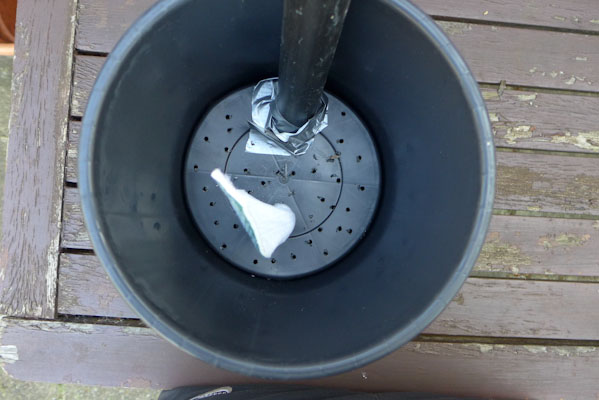
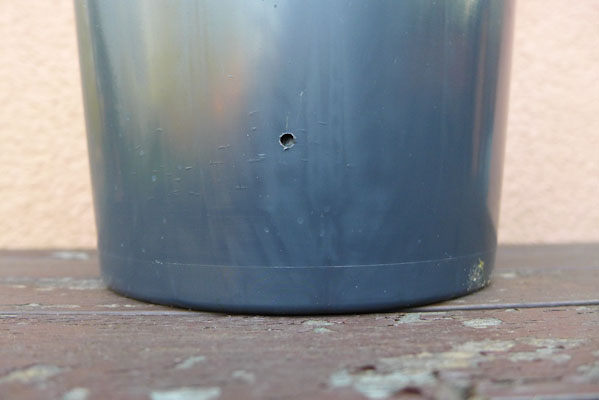
Self Watering Pot Aerrate Roots Self Watering Pot_ Self Watering Pot_-3


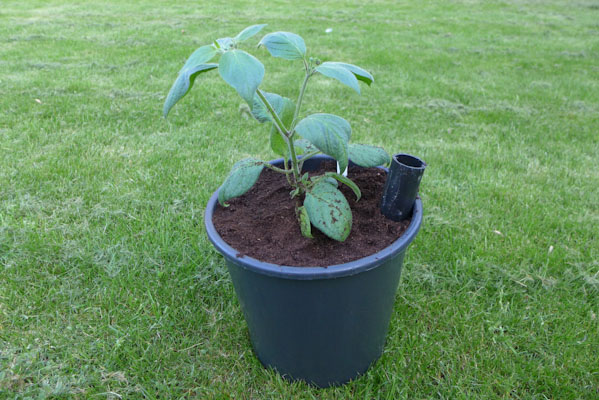
Above is the finished product. The Orange Rocoto pictured above has been thriving since it was planted up. As with other self watering pots I water from the top straight after potting up the plant. Then I leave the plant for a few days to dry out before i fill the water reservoir up. Doing so will encourage the plants roots to grow stronger and hopefully find the wick sooner once the reservoir is filled.

15 comments