≡ Menu

Back in 2012 we wrote an article about a new business Potters Plants that sell chilli plants online. We have always been impressed with the quality of the plugs we’ve received from them so we recently caught up with Rich & Holly (the owners) in search of some chilli growing tips!

How many plants are you growing this year?

For 2014 we set over 2,000 chilli plants and around 500 tomato plants. We had excellent germination so we are currently growing around 2000 plants in total , 50% of which are now already sold by order on the website.

Presumably you have some sort of poly tunnel or glasshouse for that many?

Yes we have three greenhouses and a poly tunnel, the largest greenhouse is sufficient for our chilli and tomato plants while they are in plugs , any we decide to keep and grow on to harvest are then migrated into the other greenhouses and poly tunnel.

How much does the weather affect your plant production?

Weather plays a huge part in how quickly the chillies grow. Warmer , sunny weather is definitely preferred, while harsh frosts mean constant nightly efforts to cover and protect the plants, even inside the greenhouse . Obviously as summer arrives, the sunny warmth is essential for getting the fruit to ripen too.
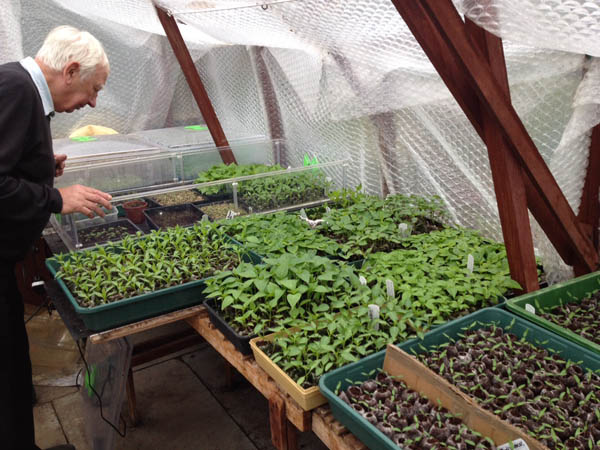
Potter Senior Inspecting

Potter Senior Inspecting the Crop

What kind of lighting set up do you use?

Last year we used some led strip lights as we didn’t have enough space in the greenhouse but this year we are back in the greenhouse and the daily light is proving much better , our plants are strong and green, we are really pleased with them. I guess there is no substitute for natural 🙂

What are you most popular varieties?

Well, people seem to love the super hot chillies for sure, Trinidad Scorpion Butch T, Bhut Jolokia, Moruga Scorpion and this year the Carolina Reaper  . One chilli that consistently performs well and matches the super hots for sales is the Pimientos de Padron .
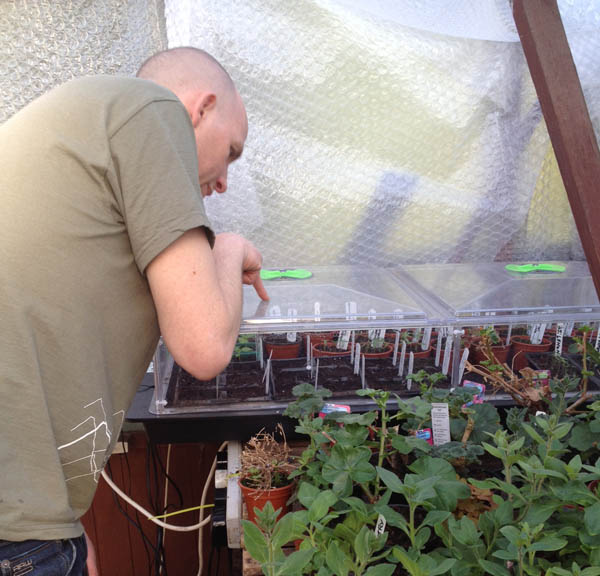
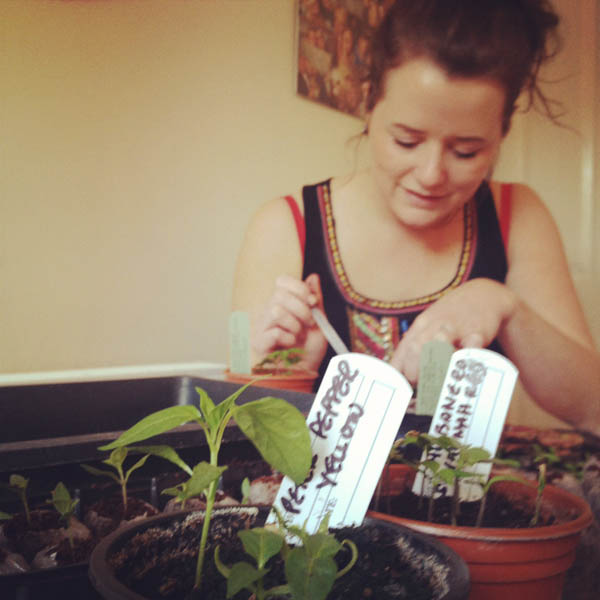
Rich Potter Holly Potting On

Rich & Holly Potter 

What are the biggest challenges you face growing chillies for customers?

Weather is obviously a challenge, but the biggest challenge is the packaging. It’s time consuming, and after all the hard work growing them, we take great care in trying to make sure the plants are securely packed for their journey.

What variety do you eat most of and why?

We probably eat pardons quite a lot, mainly because the plant produces a lot of them and they make a great tapas dish, and orange habanero , which are so tasty and have a nice manageable heat which works so well in stir fry or chilli.

Any secret growing tips for our readers?

One thing we have noticed is chilli plants love a grow bag . Standard ones you get from the garden centre – we got such a good harvest list year our freezer is still full. We have the benefit of a greenhouse of course, a conservatory is just as good if you can or a warm windowsill for growing your plant. Also , don’t over water the chilli plant, and feed once a week with chilli focus or a tomato feed.

If you’ve left it a bit late to start of your super hots or you fancy trying some new varieties you can order your chilli plants now form Potter Plants.
0 comments

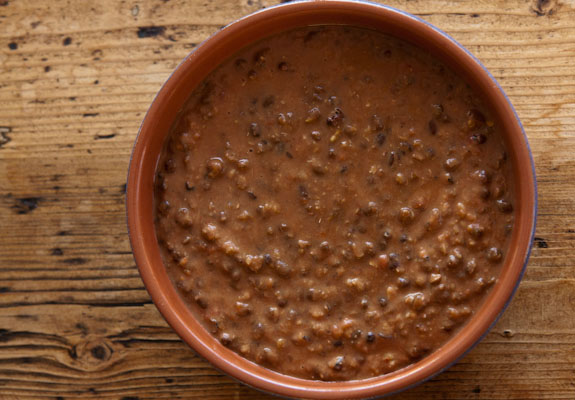
Dal Makhani is a classic dish that originates from Northern India. It is a national treasure that until now I have found very hard to and replicate at home. After a few failed attempts using a regular pan and even a pressure cooker making this dal in a slow cooker is the only way I have managed to get an authentic tasting dal makhani at home.

When travelling around North India a few years ago I discovered the delights of Dal Makhani. I’ve since eaten it in 5 star hotels in India, family run restaurants all over the UK. To date by far the best I’ve tasted was the roadside ‘dhabas’ (truck stops) of Northern India.

I’ve heard time and time again, whenever I have asked, that the secret behind truly great makhani is the length of time it is cooked for (not just the cream and butter!).  Traditionally the dal is cooked overnight in the restaurant tandoor after service has finished. The slowly cooling tandoors (that are traditionally sunk into the ground for better insulation) provide a constant source of low heat throughout the night. It is this very long cooking time that breaks the black (urad) dal down into such a creamy, rich texture. Using a slow cooker replicates this kind of traditional cooking perfectly.

Dal Makhani Slow Cooker Recipe

I’ve seen this dal cooked in restaurants in India and often an ungodly amount of cream and ghee (butter) are used to richen the dish up. The recipe below uses only a small amount of both so is relatively healthy. In fact you could easily leave the cream out and not notice it.

Dal Makhani Ingredients

  • 2 Cups of black whole dal (urad dal)
  • 1/2 cup of tinned kidney beans (rajma)
  • 150g of tomato puree
  • 2 tsp of cumin seeds
  • 1 tsp of coriander seeds
  • 1 tsp of black pepper
  • 1 tsp of garam masala
  • 1 tsp of dried fenugreek (methi) leaves
  • 2 dried red chillies
  • 3 crushed cloves of garlic
  • 4 thumb pieces of ginger
  • 2 tsp of salt
  • 2 fresh green chillies
  • 30g butter
  • 100ml of fresh cream

Method

1. Thoroughly wash the dal in cold water until the water runs clear. Soak in a bowl of water overnight.

2. Wash the dal once more then add them to a pressure cooker along with 6 cups of water and cook for 5 whistles. If you don’t have a pressure cooker you can simply cook them overnight in a slow cooker overnight.

3. The lentils should now be cooked and relatively soft. Mash them roughly with a potato masher for a few seconds to break them down slightly. This helps to speed up the creation of that creamy texture.

4. Using a pestle and mortar or food processor grind the cumin seeds, coriander seeds, fenugreek leaves, black pepper and dried red chillies into a fine powder.

5. Combine the garlic and ginger into paste along with a little water in either a pestle and mortar or food processor.

6. Add the dal to the slow cooker along with the water they cooked in and the kidney beans.

7. Stir in the spice mixture from point 4, the ginger and garlic paste from 5, the tomato puree, salt, butter and fresh green chillies (cut in half). There should be at least an inch of the cooking water above the dal at this stage. If it looks a little too watery then it is probably perfect. If not add a little more water.

8. Cook in the slow cooker for at least 6 hours on a medium heat, ideally for 12 hours on a low heat. You can’t really over cook this dal, the longer the better.

9. Before serving stir in the cream and serve with freshly chopped coriander leaves.

As with all dal dishes this tastes even better the next day as the flavours have even more time to mingle with each other. The recipe above makes enough to serve about 8 people so if you need less simply half the recipe.

This dal freezes very well so I usually make a large batch and before adding the cream separate out any that I want to freeze into an air tight container. To reheat simple add the frozen dal to a pan and heat over a low flame until hot and cooked through.


3 comments

Making your own chilli flakes or powder is very simple and perhaps the easiest way to use up a glut of ripe chillies. Making flakes is the perfect activity for an autumn when you plants are heaving with ripe fruit.

The easiest method that produces the most consistent results is to use a food dehydrator. That said it is just as easy to use a regular regular domestic oven.

I make each batch with a different variety so the resulting flakes keep the distinct flavours of the pods used. However feel free to try making some blends and let us know what works best!

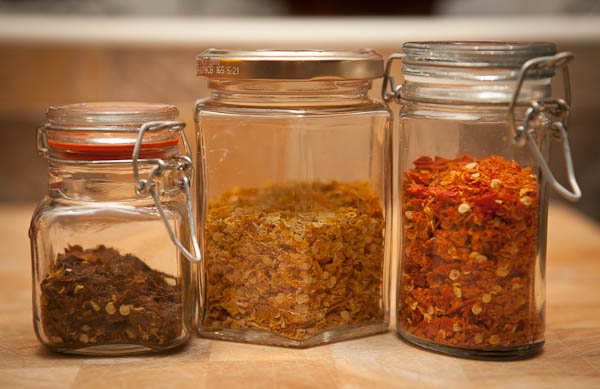
In this batch I made three separate grinds:

  1. Yellow – made solely from Aji Lemon pods
  2. Brown – from Chocolate Habanero
  3. Red – from a mix of Spanish Naga, Tinidad Scorpiam Moruga & Naga Jolokia. This is very hot!

How to Make the Flakes

1. Wash and towel dry your chilli pods

2. De-stalk and slice the pods in half, placing face up on a baking tray (leave the seeds in)

3. Place in an oven heated to 80 degrees celcius (approx 175 fahrenheit) and leave the door slightly ajar

4. Check the pods every hour. You can remove them from the oven when the pods are brittle and crumble between your fingers. Depending on the variety this can take anything from 2-5 hours.

[ad name=”square”]

By leaving the oven door slightly ajar the moisture can escape the oven, which in turn helps with the drying process. It also helps to ensure a lower temperature, reducing the chances of you cooking the pods. The aim is to dry the chilli pods not to cook them.

The chillies will give off quite an intense aroma during this drying phase so it might be an idea to shut the kitchen door and open a couple of windows.

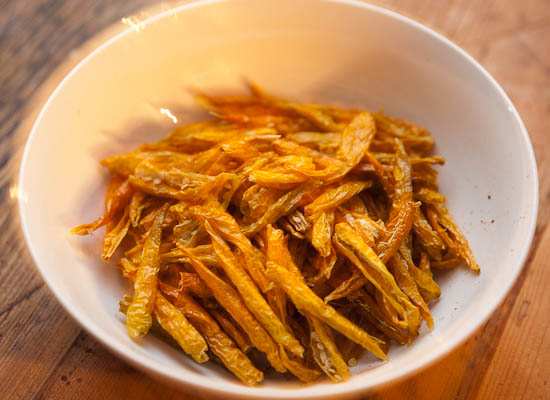
Dried Aji Lemon

Different varieties of pods will take different amounts of time. When you can easily crumble the pods between your fingers you know they’re done.

How To Make Chilli Flakes

Once the chillies have dried remove the pods from the oven before grinding them to the size you desire. Personally I like the resulting mixture to be about half powder and half small flakes.

For this batch I simply placed the dry chillies in a bowl and ground them down between my fingers. You could easily use a spice grinder or pestle and mortar instead.

If using your hand be sure to wear rubber gloves….oh and don’t remove you contact lenses just after making your powder!

4 comments