It is now Spring and I have a healthy batch of chilli seedlings well on the way. I’ve been extremely busy over the last few weeks moving home as well as starting a new job so i’ve neglecting my chilli plants a bit recently.
After my plants germinated back in the first week of April I used a home made light box to help their growth. The main reason for doing this was the lack of south facing window or sunny garden at my old home.
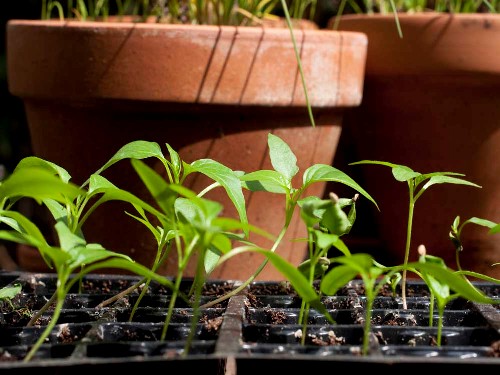
As you can see in the photo above, my pepper seedlings were long overdue to be potted on. Finally last weekend I found the time to putting them into individual pots. I don’t think the plants have suffered too much from being stuck in a cell tray however it may take them a while to put on more growth while their somewhat small roots get used to their new larger pots.
I usually tend to pot on my chilli plants 3 to 4 times between when they germinate and when they are fully grown. I germinated this years crop in seed cell trays with the aid of a heat mat. Now i’ve just put them into 3 ” pots and i’ll probably put them straight into 9″ pots in a few weeks time.
As with all plants when re-potting them try to avoid disturbing the roots as much as possible. This can be tricky when removing them from seed cells so I use 2 x lolly sticks stuck together as a little spade to help me get the root ball out in one piece.
Save Money on Small Pots
I have just repotted my chilli plants into some old plastic drinks cups recycled from work. They are slightly larger than your average drinking fountain cup measuring about 3.5″ (9cm) diameter across the top. The plants will only be in these pots for a few weeks at most so i’m more than happy to use drinking cups. All i do is use a drill to put 2 or 3 drainage holes in the bottom of each pot.

As well as saving money on pots, helping the environment another advantage of using these clear cups is they let you see exactly how dry the compost inside is so you can ensure you don’t over water the plants.
Having moved house a couple of weeks ago the plants have now been installed in their new home – a conservatory. One problem I had in my old home was the very small, shaded garden which meant my chillies received very little direct sunlight. I’ll be interested to see how their growth rate increases now they are living in a warmer, sunny environment.
[ad name=”square”]
Dear Readers,
As many of our regular readers have noticed our site has undergone somewhat of a transormation in recent weeks. We’ve migrated the site onto a new content management system (which was a very painful process!) which should make maintaining the site much easier going forward, allowing us to spend more time on creating interesting articles for you.
As well as the migration we’ve freshened up the design to make it slightly more pleasing to the eye and will be able to add more features over the coming months. Unfortunately due to insesant spammers we had to shut down the forum we had however we are already looking at creating another on using some much more secure software. More news on this to follow.
Stay in Touch
If you like what you read here you can be kept informed about future articles by either signing up to our RSS feed or instead you can receive an email notification every time we post new content here at The Chilli King, more details on how to do this on our subscription page. Oh and don’t forget you can also follow us on twitter.
Also our site is now iphone compatible so you can now easily catch up with the ChilliKing while out and about on your smart phone.
Useful Resources
If you are new to the site here is a list of our most popular resources over the past 3 months:
Our Guide To Growing Chilli Plants
Chilli Gro Lights
Chilli Oil Recipe
How To Preserve Chilli Peppers
Chilli Pepper Seeds
Thanks for visiting TheChilliking, I hope you enjoyed your stay! If you have any questions about the site, or suggestions for improvements please get in touch by leaving a comment below or sending me a message using our contact form.
Ok so this recipe doesn’t sound too glamorous but give it a try, it tastes amazing. It is based on a traditional recipe from the South of Italy.
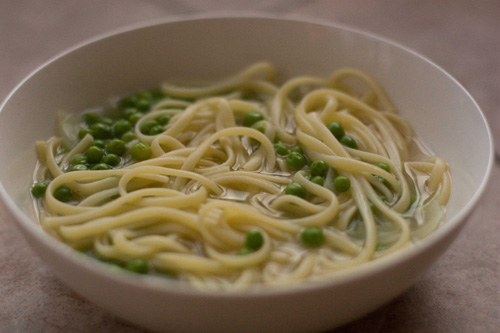
Be sure not to forget the Parmesan and olive oil at the end as these two elements really make this soup special.
[ad name=”square”]
Spic Pea & Pasta Ingredients
8oz Broken Linguine or Spaghetti Pasta
1 medium Onion
2 cups of peas (fresh or frozen)
1/2 liter Vegetable Stock
Fresh Thyme
Dried Chilli Flakes
1 tablespoon of grated Parmesan cheese
Extra Virgin Olive Oil
Method
Finely chop the onion and fry over a low heat for about 10 minutes or until soft. Add the vegetable stock to the onions then add the thyme & chilli.
Break the linguine into pieces about 3-4cm in length and add to the pan. Simmer on a low heat until the pasta is cooked (about 10-13 minutes).
Season to taste then serve in a bowl being sure to add a sprinkle of grated Parmesan cheese and a small glug of fresh extra virgin olive oil.