≡ Menu

Once you have raised your chillie plants from seeds and nurtured their move outside to take advantage of the spring sunshine there is nothing more annoying than seeing your future crop decimated by slugs or snails. In just 3 or 4 nights slugs or snails can do a huge amount of damage to chilli plants as well as other plants or vegetables in your garden.

Tell tale signs or slug/snail damage

As can be seen in the below photo, the typical sign of snail damage is holes appearing in the leaves of your plants. In addition both types of mollusk prefer young tender plants. Damage also often occurs around the lower stem of plants. Not only does the damage look unsightly but it can have a serious effect on the future growth of your chilli plants.
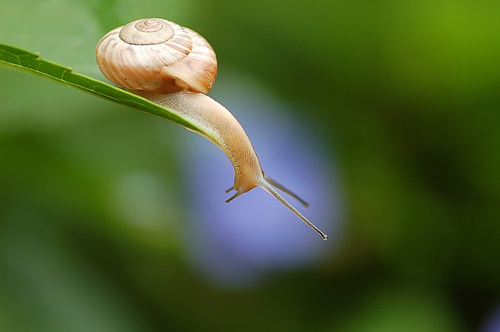
Snail On A Leafimage by SuiKa

Of course the most famous sign of snails is the slimy trail they tend to move behind. This will often give you some idea of their movements the night before. When tracking these trails it can become apparent how much ground they can cover.

Both snails and slugs tend to be nocturnal meaning that you will rarely find them during the day time. They tend to come out and feed at night when the temperature is much cooler and more humid, particularly after it has been raining. Unfortunately this means that they do most of the damage to our plants while we are sound asleep.

How to be rid of slugs and snails

1) Go picking – Head out about 2 hours after sunset armed with a torch (this is the time when mollusks are at their most active). Simply look around and remove any offenders you see. They can either be launched over your garden fence or should you prefer permanently removed!

2) The Barrier method – Mollusks are known to dislike crawling across various substances including copper, eggshells and gravel. One effective approach is to create a ring around your plants with one of these substances. This will hopefully encourage the slugs and snails to go elsewhere in search of food.

3) Encourage predators – Frogs, hedgehogs and birds all love to eat mollusks. Attracting all three to your garden by creating a small pond, nesting sites for hedgehogs and birds is a great natural approach to control these pests.

4) Slug / Snail Traps
– You can create your own trap by sinking a plastic cup (or half a plastic bottle) into the ground so the rim is level with the ground and half fill with beer. Traditional beer works well (ale not lager!) or if you don’t have any beer to waste then a mix of warm water, sugar and yeast will work well.  This should attract the mollusks in to drown a happy death. To be most effective you will need about 1 trap per square meter of plant beds and try to position the traps in a shady dark corner of your garden.

5) Chemical Warfare – This is perhaps the most un organic method. Slug and snail pellets do work well however they can be harmful for children or pets if consumed. In addition should birds eat the poisoned mollusks, they too can become ill. If possible opt for an organic non-metaldehyde bait.

6) Nematodes – Nematodes are a great way to see of slug problems on badly affected areas of plants. Nematodes are microscopic organisms (invisible to the naked eye) that are harmless to humans and other wildlife but deadly to slugs. They kill the slugs by introducing bacteria to the slugs that causes death. Nematodes are mixed with water prior to watering, ideally just after a rainfall in the evening (to minimize evaporation). One watering should last a few weeks. The best time to use nematodes is late spring when they breed the most and your young plants are at their most vulnerable.

[ad name=”square”]

The best method to control slugs and snails is…

… Use a combination of all of the methods discussed above. Be persistent and try to go out into your garden mollusk picking every night, refill beer traps regularly and ensure barriers are well maintained. If you do this you should manage to control any infestation. Try to avoid using pesticide if possible, think of it as a last resort.

If you have got any tips to help control mollusks please share them by leaving a comment below.
11 comments

We quite often get asked by readers for advice about about growing bell peppers from seed. While most of the advice on this site is dedicated to growing hot peppers, we also grow our fair share of sweet peppers. Bell peppers are not only easy to grow but are great to cook with – both in hot dishes or cold salads.

Bell peppers are from the same family as chilli peppers, the only difference being that bell peppers do not contain any capsaicin which is the chemical that produces the heat in hot peppers.

Below we’ll try to set out all of the information you’ll need to know in order to grow your own bell peppers.

Growing Bell Peppersimage by dandy_fsj

When To Plant Bell Peppers

As with growing chilli peppers and many other types of vegetable the key to a good harvest is to maximize your growing season. You should aim to plant your pepper seeds about 6 weeks before the last frost arrives. Bell peppers grow quite rapidly so aim to use 3 inch pots as opposed to seedling cells or something smaller as they’ll soon outgrow seed trays, particularly if the conditions are right.

Until summer is fully set it is best to keep the plants either on a sunny window sill or in a greenhouse until night time temperatures remain high. The more light and heat your pepper seedlings get, the quicker and stronger they will grow.

Potting On Bell Peppers

When your seedlings reach about 6″ in height it is time to pot them on. Again choose an area of the garden with good sunlight and drainage, a raised bed is ideal. If you have the space then sweet pepper plants (like hot peppers) will benefit greatly from the extra heat provided by a greenhouse or conservatory.

I tend to transplant my peppers straight into the the ground (dug in with more compost) however growing bell peppers in containers works equally well (as well as meaning you end up with portable plants!). If using containers to grow your peppers try and place them in at least 12″ diameter pots and be sure to cut a couple of drainage holes in the bottom of the pots.

One thing worth remembering is that like tomato plants sweet pepper plants (depending on variety) can grow up to 4-5 feet in height so it can be a good idea to stake your plants using bamboo canes. This will not only give the plants some support but it’ll help protect them from any sudden gusts of wind.

Feeding & Watering Bell Pepper Plants

Bell peppers really do like good quality soil. If you plant them in rich well fed soil they’ll reward you with lots of great tasting fruit. During the winter I dig in some natural manure to the soil along with some home made compost in order to give the peppers the best growing medium possible come the spring.

To further help the plants when they start to flower and fruit you can feed them with some nitrogen based tomato food. As with my hot pepper I use about half the recommended strength once a week.

You should water your bell pepper plants regularly. Keeping the soil they are in moist will help them develop a sweet taste. During the summer you should be aiming to water both morning and evening to prevent them from drying out. Be aware that if your plants are in containers they will dry out much quicker than if they are in the ground so be sure to water regularly. A great tip is to mulch around the base of your plants to help retain moisture near the roots.

When Are Bell Peppers Ripe?

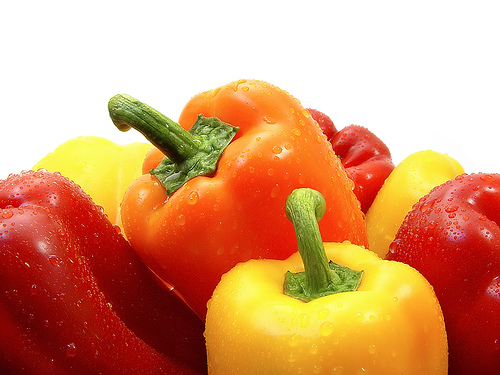
This causes a lot of confusion. Most bell peppers start of Green (sometimes brown/green) and depending on variety ripen into Orange, Yellow or Red. It is fine to harvest and eat bell peppers at any time. As with chillies, the longer they are left on the plant the sweeter they tend to become. As a general rule the redder the pepper, the sweeter it is.

When harvesting peppers be careful not to damage the plant. Snip of ripe fruit with a pair of pruners or scissors as opposed to pulling them off. Also like chilli plants, taking ripe fruit from the plant will encourage more to grow so harvest ripe fruit to maximize your plants yields.

Pests & Diseases

We’ve already covered the main threats or problems you’ll encounter to your bell peppers on our pests and diseases article.

What To Do With Your Bell Peppers

Ok, so you’ve grown some bell peppers but what next? We’ll you could do a lot worse than make some delicious stuffed bell peppers using the recipe below.

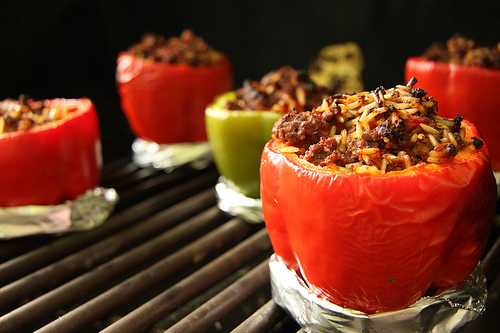
Stuffed Bell Peppersimage by another pint please

Stuffed bell peppers are a great, versatile recipe. The below recipe is just a base, feel free to experiment or substitute ingredients to taste.

Ingredients

  • 4 large bell peppers
  • small handful of cooked rice
  • handful of chopped basil
  • 1 table spoon of olive oil
  • 2 handfuls of cherry tomatoes
  • 1/3 cup of grated cheese
  • salt and pepper
  • 1 finely chopped braising steak
  • 1/2 cup of vegetable stock

Method

This recipe is so simple. Cut the tops off the bell peppers and remove the core and seeds using a table spoon. Place the peppers on a baking tray covered in foil and bake for 5-8 mins at 200 degree.

Remove from the oven and finley chop all of the other ingredients (apart from the cherry tomatoes, use these whole) and mix thoroughly before spooning into the peppers. Replace the lids of the peppers, again cover in foil and bake in the oven for 40 minutes.

Remove from foil and if required grill for a3-4 minutes to char/slightly blacken the tops of the peppers. Drizzle with a little olive oil and serve.

0 comments

This Thai recipe for spicy tofu sums up Thai food. Simple, clean tasting and incredibly easy to prepare. The tofu although tasteless itself acts like a sponge soaking up all of the other flavours and providing a healthy alternative to red meats. If you’d prefer this recipe would work equally well if you substituted the tofu for chicken.

Spicy Tofu Ingredients

Tofu 200 grams
Red Thai Curry Paste 75 grams
A handful of fresh corriander
A few fresh basil leaves (thai basil if possible, if not regular italian basil is fine)
7 green chillies (finger chillies)
2/3 of a tin of coconut milk
1 large spoonful of peanut butter

Method

Cut the tofu into cubes about 2-3cm squared and in each cube make a small slit and stuff with a small amount of peanut butter.

Chop and blend all of the other ingredients together to form a marinade, adding any left over peanut butter. Marinade the tofu in this mixture for at least 30 minutes.

Heat a small amount of oil in a frying pan or ideally a griddle pan if you have one available.

Grill the tofu until a nice golden colour, turning regularly.

Serve with a nice fresh salad and some sweet chilli sauce to dip into.

0 comments