≡ Menu

The recent spell of warm weather has brought with it a spurt of fast growth from the chilli plants. Every year as Spring gets under way and Summer nears there is a flurry of activity as the batches of seeds I’ve sown over the last few weeks need re-potting.

When to Re-Pot Pepper Plants

A question we get asked a lot is ‘When to re-pot chilli plants’? As a general rule i re-pot my peppers when the roots start showing at the bottom of the pots. Below is a good example where you can see the thin white roots through the drainage holes at the bottom of the pot.

How long it takes for the roots to appear will depend on many factors, the main one being the temperature and light levels.
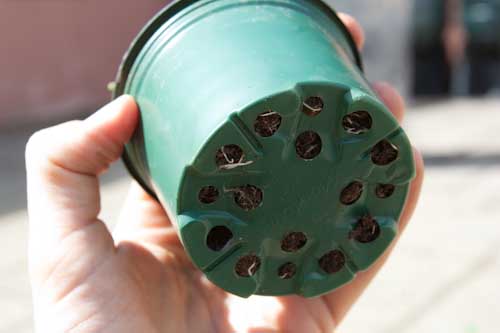
Ready to be repotted

Which Post Size is Best for Chillies?

It’s worth remembering not to move your pepper plants in to too big pots. Doing so may mean the plant concentrates its efforts on growing the roots system at the expense of foliage. For a healthy plant you need to try and promote consistent growth of both roots and foliage. To do this it is best to re-pot often into slightly larger sized pots until you reach the desired pot size later in the summer.

I typically like to plant seeds in small seed module trays then prick them out into 3″ pots once the first set of true leaves appear. From there I’ll move to a 5″ pot before moving to something around 10″ pots for maturity.

If the pots are too big for the root system of the plant, then the roots are not able to use up all of the moisture you add every time you water the plant because the roots simply can’t reach the water in the edges and bottom of the pot. This can mean the roots end up sitting surrounded by sodden wet compost which encourages fungus and rot, definitely not what you want.

Pricking out seedlings

I’ve had a large batch of Cayenne pepper seedlings inside my lightbox for the last couple of weeks. This has given them a great boost and they have been overdue to be pricked out for a while.

It can be a bit tricky to get tender young seedlings out of seed cells or trays without damaging them. However if you prepare ahead you can minimize any damage to the seedlings.

[ad name=”square”]

First of all water the tray about half an hour beforehand. Doing so will make it much easier to remove the root ball with the soil still attached which will minimize any damage. While you are waiting for for the compost to dry a little, prepare your potting on compost mix. Here is the recipe I use for potting my chillies.
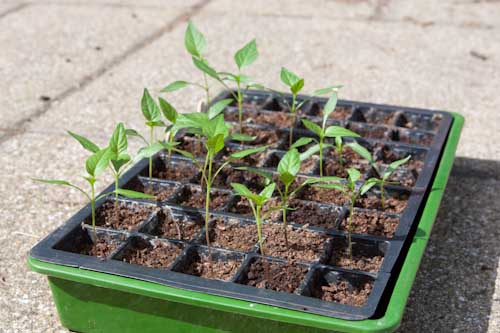
Leggy Chilli Seedlings

When selecting the right sized pot think about how big your seedlings are and how deep you want to pot them. My cayenne seedlings (see above) here were looking a bit leggy so i chose a slightly deeper pot (i used old drinking cups with drainage holes cut in the bottom) so i could re-pot them at a deeper level than before. When you do so the plant will sprout more roots from the part of the stem that is buried beneath the surface. Once you know how deep you’ll be planting your seedlings partially fill your pots with compost mix.

After watering and leaving for thirty minutes i use a large lolly stick (a small teaspoon would do the job) to gently loosen the compost around the edges of the cells. Once I’ve done all four sides with one hand i’ll gently take hold of a leave while with the other I’ll scoop out the root ball from the tray with the lolly stick. Be careful and aim to keep as much compost as possible on the root ball to minimize any damage.
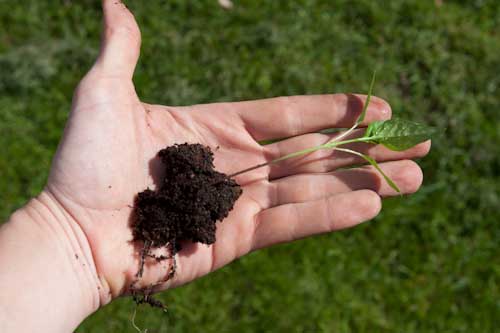
Pricked Out Cayenne Seedling

After placing the seedlings gently in the new pot and lightly filling with the potting medium I very gently firm down the compost. I then give the repotted plants a light watering (using a watering can with a fine rose) to help bed the compost around the roots.

As your plants move up into bigger pots, the larger volume of compost will mean you will not need to water as often as the growing medium will be able to store more moisture.
14 comments

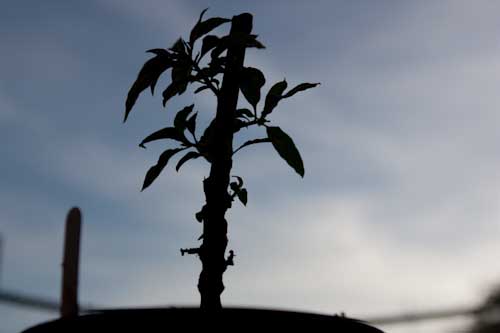
I was checking out my over wintered scotch bonnet plant at the weekend. Since sprouting new shoots back at the start of March my one surviving plant from last year has been putting on some good growth.

Over Wintered Silhouette

I’ve got plans to try and take some cuttings from this plant once the plant has put out some nice side shoots. More on that in a few weeks….

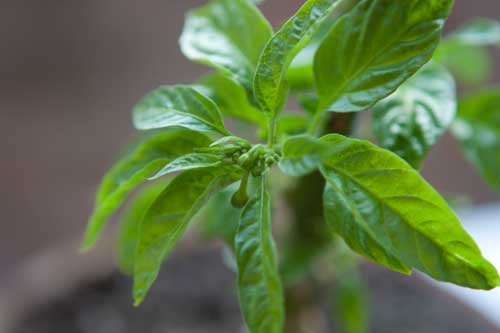
Upon closer inspection I noticed that there are a couple of small flower buds forming on the plant.Considering the small amount of foliage on the plant this is pretty surprising. I guess the sunny south facing window in the conservatory has encourage the plant to start flowering!

Over Wintered Flower

I think i’ll probably pinch these out to encourage more growth in the next few weeks. That said it is tempting to leave them and see how early I could get a ripe bonnet from the plant. I’ll aim to decide what i’ll do in the next week or so.

3 comments

When buying regular potting compost the first decision you’ll face is whether to opt for peat free or not. Peat free has traditionally been the best kind however it is particularly bad for the environment as it is harvested from the natural environment, usually from areas with fragile and diverse eco-systems.

While there are some ethically sourced peat based mediums out there they are usually flown halfway around the world  (places like Canada) so if you’re concerned for the environment, it’s probably best to opt of a peat free compost.

The good news however is that there are now a good selection of peat free composts available at virtually all garden centers. While these have had a bit of a bad reputation in the past they have improved massively in recent years.

[ad name=”square”]

Peat composts is very good at retaining moisture where as in my experience peat free composts tend to dry out very quickly. As a result when using peat free you may want to add additional ingredients to adjust the water retention of you potting medium:

Vermiculite

This is a natural mineral that has been heated to expand it out into its very light weight form. It’s main attraction is it’s ability to hold on to moisture  and slowly release it and the nutrients into into the surrounding soil over a period of time.

A common problem with plants grown in pots is that daily watering can wash out many of the nutrients from the compost. Vermiculite mixed into the compost will help avoid this problem, particularly if you’re using peat free compost which can suffer from poor water retention. I usually get through 1 bag per year and in my opinion it is well worth the £10 or so it costs.

Perlite

It is a great drainage aid to compost, ensuring that roots do not get rotten by sitting in excessively wet compost, which can be very useful if you’re using a peat based compost. I also finds that perlite helps prevent the root ball from becoming too compacted later on in the growing season.

Well Rotted Manure

Well rotted manure can be used as a substitute for peat in compost. Not only does it add a huge boost of nutrients to the mix but it also adds structure and water retaining properties to a peat free medium. Just be sure it is very well rotted before using it in order to avoid ‘scorching’ the plants roots.

The Best Chilli Growing Medium

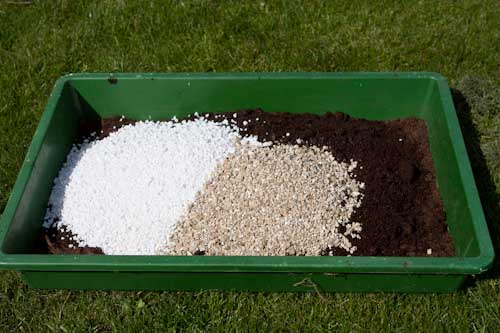
As i stated above everyone has their own preferences however i usually opt for a mix as follows:

  • 70% Peat free multi purpose compost
  • 10% Vermiculite
  • 10% Perlite
  • 10% Well rotted horse manure

I don’t get too fussy about quantities of each and usually work be feel.

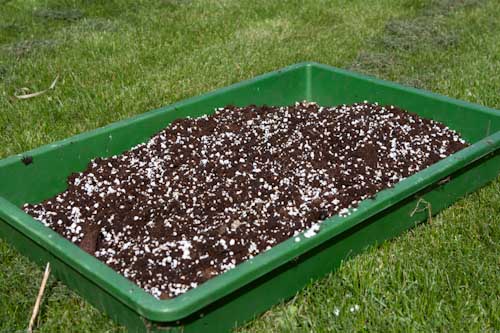
Chilli Potting Mix

Moisture Levels

Potting into a dry mix and then giving the potted plant/seeds ‘a good soak’ can cause the compost to become too compacted as the large volume of water rushes through the pot, often taking the seeds down deeper then you want or stealing away nutrients from the roots.

Potting Mix Ready for Use

When either planting seeds or potting on young plants i find it beneficial to prepare (and water) my potting medium a little bit in advance. If i feel the compost is a little dry I usually make my mix up in a bucket (using the quantities above) then water with a watering can fitted with a rose and mix well. I’ll then usually leave it 10 minutes for the moisture to work through and mix again before potting.

16 comments