A few months ago i got a slightly random phone call form my father asking if I wanted a tandoor oven. He was at a local auction and had spotted a lot that contained 4 fully functional, clay lined tandoors that had presumably been used by some now defunct catering business. The good news was that they appeared in the auction catalog with a bargain looking guide price of £30-50 each.
1 week later and he turned up at our house to drop it off and my journey into cooking with a tandoor oven began. Below I’ll try and share some of my experiences and tips I’ve picked up along the way as they certainly aren’t the easiest things to cook with when you first get one.
How to Make a Tandoor Oven
Luckily I didn’t have to build our tandoor – we managed to pick it up at the local auction for about £40! However if you’re interested in building a tandoor then there are plenty of good resources on the web.
First off, here is a pretty good set of instructions for building a mini tandoor out of large terracotta pots. While the results look pretty good, it does look quite fiddly and you end up with a pretty small oven. We much prefer this site which details how to build a tandoor oven out of an oil drum with the end product looking pretty similar to what we have. Here is another great thread about making a tandoor from an oil drum.
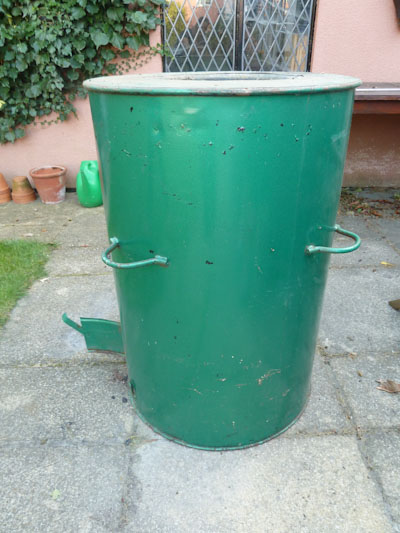
The tandoor we bought (pictured above) is very similar to the two examples above and is built from an old oil drum that has been lined with a thick layer of concrete and clay. There is a small hatch near the bottom (visible on the left hand side) that allows you to easily remove the ashes while also allowing you to adjust the airflow or draw by opening/closing the hatch door.
Cooking With a Tandoor Oven – Some Tips
Cooking with a tandoor oven is not like using your regular convection oven. It’s taken us a few attempts to get things right and iron out some of the initial challenges we were facing. Below I’ll share some of our experiences in the hope that they’ll help you avoid making the same mistakes!
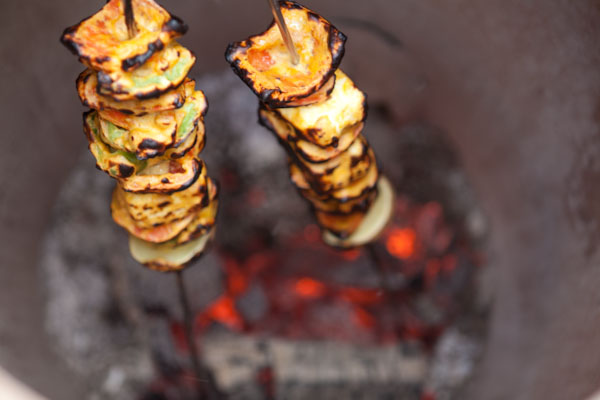
One of the biggest challenges we faced when we started using the tandoor was getting it hot enough. Much like a pizza oven the key to successful cooking in a tandoor is getting the oven really hot (up to about 450 degrees Celsius). Once a tandoor is up to temperature the food you cook receives direct heat from the embers in the bottom of the oven as well as a massive amount of heat that is radiated out of the insulated walls of the tandoor. The result should be very high temperatures that allow you to cook your food on skewers very quickly. There’s some tips below about how we get the oven hot enough.
The first time we fired the tandoor up we just used standard bbq charcoal on its own. While this did get it pretty hot and we managed to cook a few naans it was quite clear that it was nowhere near hot enough. After about 5 minutes cooking most of the heat had been lost and the naans began taking much longer to cook (up to 15 minutes!).
When we acquired the tandoor the inside was covered in charred black residue that once we started cooking naans stuck to the back of the bread and made them taste horrible. At first I didn’t know whether to try and scrape this residue off the inside of the oven or not. It turns out that this reside is in fact soot which deposits on the tandoor walls if the fire is not burning at a high enough temperature. Once I finally managed to get the oven up to temperature the residue burnt off and disappeared completely.
Getting a Tandoor Up to Temperature
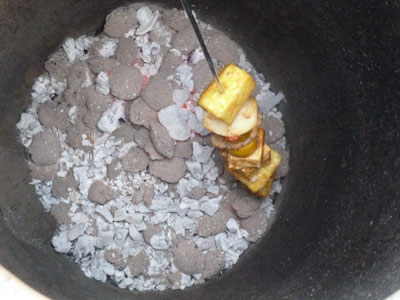
After a few attempts at getting the tandoor up to temperature I’ve settled on using a combination of charcoal and oak kindling. I usually start the fire with some scrunched up newspaper and oak kindling and keep feeding the wood on while the oven heats up. When I’m nearing being ready to cook i add a good dose of charcoal and wait for this to burn down to embers before cooking.
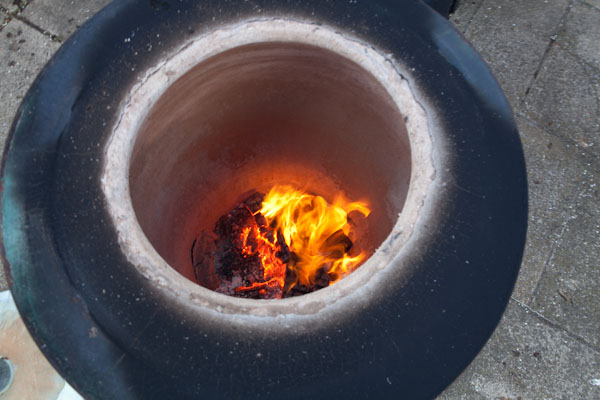
Key to increasing the strength of the fire inside is using the little hatch at the bottom. The wider the little door is open the more oxygen is sucked into the fire and the strong it burns. I’ll usually have it wide open to start with and once the oven is up to temperature I’ll gradually close it.

I usually try and allow about 1 hour at least in order to get the tandoor up to heat before starting to cook in it. Of course in India, tandoors are traditionally buried in the ground which helps to insulate them further and retain the heat – something that is hugely important as fuel tends to be expensive. Doing so would help heat retention but unfortunately we don’t really have a suitable spot in the garden for this so I’m resigned to feeding the oven a little more fuel!
The Importance of Marinading
With the exception of making naan bread, marinading is most definitely the key to any successful cooking on a tandoor. Not only do tandoori marinades add huge amounts of flavor to your food but they also tenderize the meat/vegetables. Also when inevitably some of the marinade falls off into the coals it burns adding that unmistakable smokey flavour that you only really get in a tandoor oven.
After a bit of trial and error and a few tips from an Indian chef they key to any successful marinade is to add some ‘atta’ or gram flour. Firstly the flour helps bind the liquid marinade to the ingredients, preventing it from simply dripping off. In addition gram flour doesn’t seem to have that ‘floury’ taste that regular plain wheat flour does. Be sure to take a look at our favorite tandoori marinade recipe.