About three years ago we planted a small redcurrant bush in the garden. It had been given to us by a family member as a small cutting. For the last two years we have been teased by a huge crop of juicy redcurrants that we’ve been about to pick only to be beaten to the fruit by the local wildlife. The main suspects in this currant crime are the over weight pigeons that constantly loyter in our garden.
This year I am determined to outwit the pigeons. I want to ensure we get to enjoy the glut of red currants we should have every summer. I don’t really have the space or inclination for a large, expensive fruit cage with aluminum frame. So instead started researching cheaper, more DIY approaches.
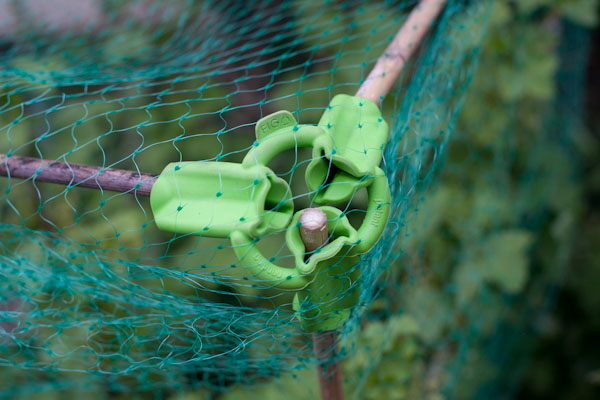
After much searching I found these excellent Figo Cane connectors. They are soft rubber connectors that allow you to easily connect standard bamboo canes together. Their real advantage compared to other similar products I found is that they allow you to easily connect canes with quite differing thicknesses.
The Build Process
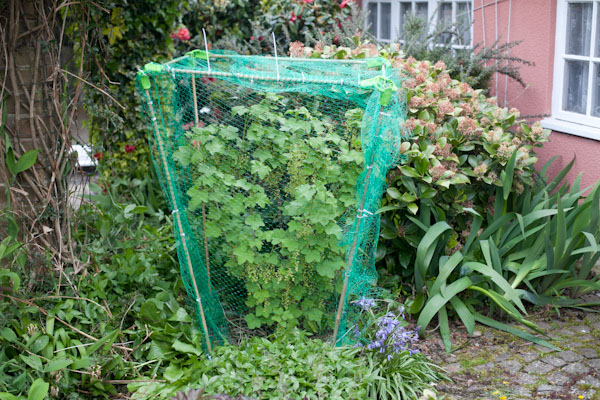
Once the connectors arrived the cage was quickly built by forming a square roughly a bit larger than the foot print of the bush. Next I simply cut the four vertical canes to size, pushed them into the ground and connected the square ‘top’. Next I simply wrapped the cage in netting and made some improvised pegs from metal wire in order to stop the birds from creeping under the net.
Finally I secured the netting to the canes with some cable ties. Time will tell but the cage looks very secure, has a slim profile. As a result it should survive strong wind. More importantly I see no way how any pesky pigeons will be able to get at our precious red currants.
DIY Fruit Cage Results
This simple solution has kept the pigeons away from our fruit and ensured we get a great harvest from our bushes. We love the fact they are quick to put up and take down so when they are not need they can be packed away and not make the garden look cluttered.
If you want an authentic taste of Mexican food, look no further than the quesadilla. This delicious black bean quesadilla recipe is incredibly quick to make. It can usually be made out of purely store cupboard ingredients.
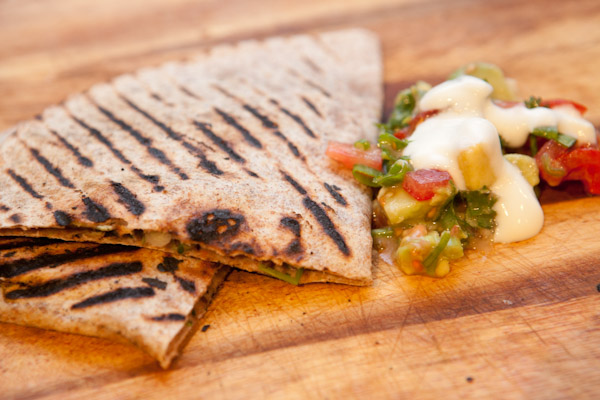
The recipe only take a few minutes to make. This makes it ideal for a quick midweek supper or perfect to make when you are entertaining.
Bean Paste Ingredients
- 1 tin of black beans
- 1 teaspoon of roasted/ground cumin seeds
- 1/2 teaspoon of ground coriander seeds
- Juice from 1/2 a lemon
- pinch of salt
- 1 handful of chopped fresh coriander
Salsa Ingredients
- 2 chopped fresh tomatoes
- 1/2 finely sliced onion
- 1 x clove of garlic
- 1 x red chillie
- 1 x handful of fresh coriander
- Juice form 1/2 lime
Other ingredients
- Corn tortillas
- Sour cream for garnish
- Grated cheddar cheese
[ad name=”square”]
Method
1. Place all of the ingredients for the past into a food mixer and blend to a rough paste.
2. Roughly chop the salsa ingredients and mix in a bowl
3. Add 2 spoonfuls of the paste and a handful of cheddar to the centre of a tortilla then spread evenly to within 3cm of the edges.
4. Fold the tortilla in half, press down and cook on a hot griddle pan (no oil needed) until slightly charred. Turn over and cook the other side.
5. Serve with the salsa either on the side or placed inside each tortilla.
If you’re time crunched you can even freeze these quesadillas. Simply stack them before cooking them with baking parchment paper between them and freeze them in a Tupperware box. To cook them simply cook slowly from frozen until the middle is defrosted and the tortillas a crispy on the outside.
For an extra touch serve with a bowl of our famous habanero salsa on the side for that authentic Mexican flavour.
The purpose of this recipe is to make a simple, healthy dal dish with the least possible effort involved. No oil, no ghee just a simple tasty dish that would happily grace the table of any Indian family.
As with all dal recipes the longer and slower you cook them the better the end result. As a result I now tend to make most of my dal recipes, including this one using a slow cooker. A slow cooker perfectly replicates the traditional way of cooking dal overnight on the dying embers of a tandoor clay oven.
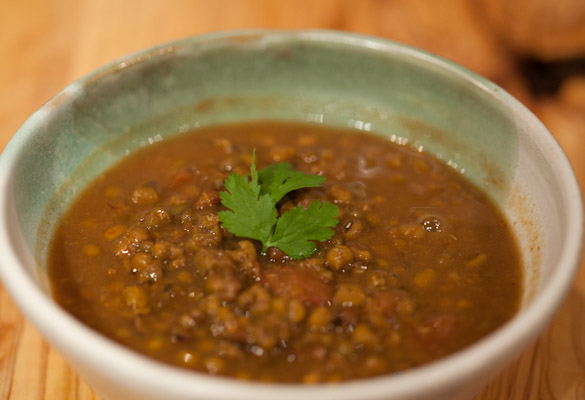
Mung Dal Ingredients
- 1 x cup of green mung dal
- 1 x teaspoon of ground cumin seeds
- 1 x teaspoon of turmeric
- 1/2 teaspoon of salt
- 2 x chopped tomatoes
- 1 x green chilli sliced in half
Directions
1. Wash and soak the dal overnight before placing in the slow cooker with the rest of the ingredients.
2. Cook for 24 hours in the slow cooker on ‘medium’ or until the dal is tender and is very soft to bite.
3. Serve with fresh naan, chapati or rice and yogurt.
With so few ingredients this recipe takes only 2-3 minutes actual preparation. All of the heavy lifting is done by the slow cooker so you just need to make sure you plan ahead a day or two beforehand.