≡ Menu

It’s mid November, the nights have drawn in and winter it seems is well and truly with us. As we wonder if those last few pods will ripen there are a few jobs that we can be getting on with in order to help prepare for a great year of chilli growing next year…

Harvets the last chillies

This year has been a strange one here in the UK; heatwave in April, a cold wet and windy August and an unusually mild autumn. The net result of this is that unusually for mid November I am still getting habaneros ripening! I moved most of my plants back under glass a few weeks ago and amazingly they are still ripening.

As you can see in the picture below some of my habaneros are a bit stunted this year – i think this is due to the inconsistent weather. The plant below was over wintered from last year when it produced normal sized fruit so this must be the reason.
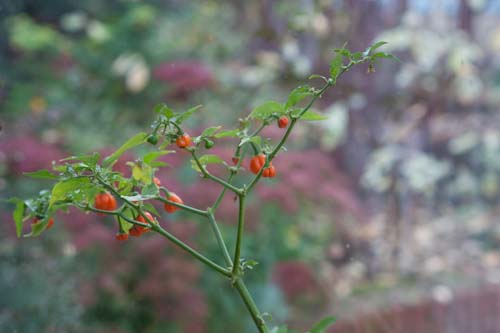
Ripening Orange Habanero

By now I have already harvested most of my chillies and as ever have used various different methods to preserve my crop so i can continue to enjoy them over the coming winter. With the remainder i’ll eat most of them fresh and will freeze the remainder.

[ad name=”square”]

Clean the greenhouse

I don’t actually have a greenhouse but have instead taken over a conservatory that has now become known as ‘the chilli house‘. By the end of each growing season it is filthy. As well as chillies there is always a large amount of tomatoes, cucumbers grown in there along with a constant supply of seedlings and cuttings throughout the year.
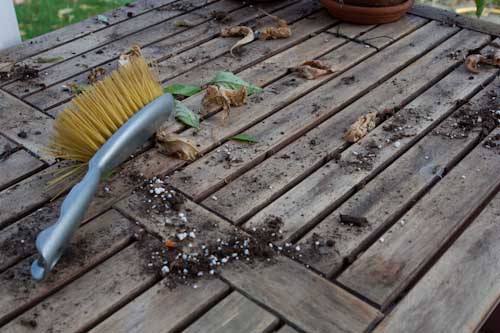
clean the greenhouse

Having a good clear out and thorough clean of the floor and glass is not just good for the soul but it also helps prevent the spread of diseases and bugs. There are no secrets, just a bit of hard graft required. I simply take everything out, give it a good sweep out and wash the windows, walls and floor.

Insulate the greenhouse

As mentioned above I’m lucky enough to have a double glazed conservatory to grow my plants in. If your greenhouse is single glazed and you’re planning to over winter some chilli plants then you may want to consider insulating the greenhouse with bubble wrap.

Doing so will keep the temperature a few degrees higher than normal which can help you avoid losing any plants during a particularly cold frost. If you live in a slightly warmer climate then you might be able to just get away with a small greenhouse heater like i do.
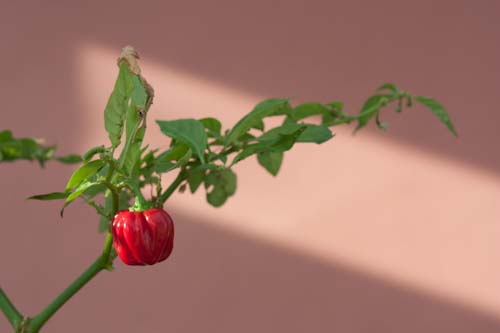
last harvest of the year

Sort the seeds

Every year, like most chilli growers I get carried away and buy way too many seeds each spring. The winter is the perfect time to have a good clearing and throw any old seed away and work out what seeds you can use next year.

Don’t forget to ensure you store your seeds correctly. Ideally keep them in an air tight container in a cool dark room. An old biscuit tin in the garden shed is pretty much what you are after!

Choose plants to overwinter

We’ve written numerous articles on overwintering on this site over the last few years. In order to give yourself the best chance of success choose the strongest healthiest plants that produced the most crop this year. Look for plants with no disease that have produced a good quantity of tasty peppers.

Once you’ve selected the plants to over winter you can add the remaining plants that have stopped fruiting to the compost heap. In order to speed up the composting process try to break up the root balls as much as possible before adding to the heap. For more composting tips take a look at our comprehensive guide to composting.

Take stock

Don’t forget to take stock of your growing season. I find it useful to make a few notes on what varieties I grew, what the weather was like and worked grew well and what didn’t. You’ll find that in the future you may want to refer back to see what worked well in previous years and what ended in disaster!

Plan for next year

Now is of course the best time to plan next years crop and start sourcing seeds. Remember that slow growing varieties such as naga, bhut jokokia and habaneros need a long growing season. To get the best from these plants you may want to consider planting some seeds arums Christmas time to get a big head start on the growing season.

Of course if you’re planting seeds so early don’t forget you may have to provide some artificial light to the seedlings to get them through the dark winter. Whether it is a grow light setup, a mini greenhouse or indoor windowsills now is the time to start planning (and maybe negotiating with the wife!) where you’ll be keeping all of next years crop until the spring arrives fully.
1 comment

Its getting to that time of year when plants start dying back and the garden starts to look a bit scruffy. I tend to grow a lot of potted plants, not just chillies so at this time of the year I have large quantities of dead plants, root balls and other garden waste to dispose off.

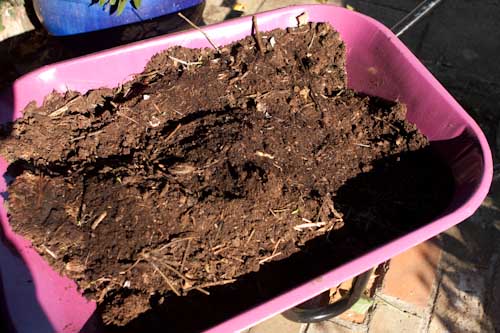
It makes perfect sense to me to compost as much as possible. Not only is it an environmentally friendly way to get rid of waste but of course you also gain a free supply of top quality compost that can be used for next years plants be they grown in pots or in the ground.

Homemade compost

Making compost is easier than most people think. As long as you follow some basic steps you should have no problems producing great quality compost in just a few months.

Types of Compost Heap

The first thing you’ll need to do is to decide what type of compost heap you’re going to have. You can start off with a simple pile of debris on the ground but depending on the space and available budget you may choose a different solution. Below we’ve listed the most popular choices.

1. Traditional Heap

The easiest and cheapest. You compost heap can be as simple as a heap in a corner of the garden or a elaborate as a multi -stage system like the guys at Good Cheer Garden built out of old pallets.

Much will depend on the space and materials you have to hand. A multi section system allows you to move the material as it decomposes meaning you need to spend less time turning the compost and always have easy access to usable compost.

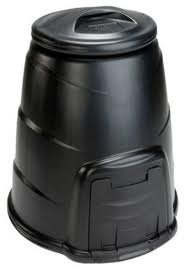
2. Dalek Dalek Composter

These plastic compost bins are compact, tidy and easy to use, particularly if you have limited space. You simply add new material to the top and take out the finished compost via a flap at the bottom.

Many councils offer highly subsidized rates on these bins making them extremely cheap to buy so be sure to check with your local council before buying one at a garden center.

3. Tumbler

These types of composters are like giant tombolas. Though they take up more room in the garden they are designed so that the process of turning your compost is extremely easy. To turn you simply spin the composter round, meaning there is no need to get your hands dirty.

Generally the more you turn compost the quicker the decomposing takes. As a result these tumbling composters make compost the quickest out of the three types though they are also the most expensive to buy. I have a friend who loves his Parasene tumbler and highly recommends them.

What Can You Compost?

The key to making good compost is to use a wide variety of material. Ideally you should have an equal mix of green and brown material (see below for the definitions). The green materials are high in Nitrogen which help to get the decomposing organisms going while the brown material is carbon rich – great food for the organisms.

Green Ingredients:

Grass Cuttings
Nettles
Comfry
Garden prunings
Vegetable peelings
Tea bags/coffee grinds

Brown Ingredients:

Cardboard
Shredded waste paper (avoid glossy paper)
Fallen leaves
Woody prunings

Other:
Hair clippings
Crushed egg shells
Old egg cartons

Keep your Compost Moist

If using a closed composter such as a dalek or a tumbler then you may need to occasionally water your compost heap. The pile should be moist but not so wet that the material becomes slimy and rots.

[ad name=”square”]

Avoid water logging by ensuring there is adequate drainage at the bottom of your pile. This can easily be achieved by adding a few bits of wood to the bottom of your pile before starting and ensuring the pile is positioned over free draining soil.

Shred Your Waste

The smaller the material you add to the compost bin, the faster the composting process will take. Try to ensure you reduce the size of any waste you add to your compost pile. For example when using waste paper or cardboard, I run it through a regular household shredder before adding it to the pile.

A common problem gardeners face when making compost is that a lot of material they have to hand is too large or woody. If you’ve pruned back a large bush and have lots of woody branches one easy way to get it chopped nice and small is to put it on the lawn and run your lawn mower over it a few times.

Turn Your Compost

Turning your compost regularly is crucial in order to speed the process up and ensure a consistent texture to your compost. Doing so adds air to the mix to prevent is getting too damp as well as spreading the composting organisms around the pile.

If using a tumbler turning your compost is easy, simply spin the barrel. If you’re using a dalek or a regular pile then you’ll have to fork over the contents.

If you are using a dalek style compost bin then turning your compost can be difficult, particularly when the bin is nearly full. Previously I used to either struggle with a garden fork then usually end up lifting the dalek off the heap it enclosed and turn everything out onto the lawn before shoveling it back in – and creating a mess in the process.

Last year I bought a compost turner. I was a bit dubious that this would be one of those unnecessary tools that never gets used however it is exactly the opposite. Turners make the job of turning compost incredibly easy which means I now turn my heaps about every two weeks instead of twice a year!

0 comments

It’s amazing what some people will do to get on youtube. Last night i stumbled onto loads of videos of people’s reactions after eating hot chilli peppers. Some of the reactions are hilarious…i thought I’d post a few….

This one is great – two girls both sit down to eat a Bhut Jolokia (the worlds hottest chilli) and one of the girls gets away with what appears to be a pepper with no heat – the other girl is not so lucky!

This guys is brought to tears, quite literally after munching a Jolokia…

And finally here is a great megamix of some of the best clips on youtube – I love the guy at the end!!!

I don’t think i’ll be rushing to eat the world’s hottest chilli whole anytime soon based on these results!

0 comments