About three years ago i began on a mission to bake quality bread at home. After much experimentation i thought i’d cracked it and came up with what i believed was the best bread recipe ever. The beauty of this recipe was that it required no kneading whatsoever and if you prepared ahead of the long proofing time (12 hours) you ended up with some pretty damn good bread.
Over the last few days i’ve been experimenting with a more orthodox bread recipe, one which takes about 2 hours in total to make from start to finish. After a little experimentation i tink i’ve cracked it. The following recipe makes 3 small loaves. Here are the ingredients…
Ingredients
- 800g strong white flour
- 200g plain white flour
- 1 handful of semolina flour for dusting
- 10g fast action dried yeast (1.5 sachets)
- 20g fine table salt
- 1 table spoon of sunflower oil
- 400ml of warm water
- 200ml of milk (semi skimmed)
The Method
First mix the flours, salt and yeast in a large bowl. Next add the oil, water and milk and slowly mix until the mixture forms a rough dough. As it forms you can use the dough to clean the bowl to save you some clearing up later.
Place the dough on a dusted surface and knead for 10 minutes. As well as kneading with the palm/base of my hand I try and stretch the bread away from me, this stretches the gluten molecules which gives the finished bread a better texture. After the 10 minutes cup the dough ball in your palms and rotate the bread round as you gently work your hands between the bottom of the dough ball and the surface. After about 30 seconds of this a nice ball shape should be formed.
Gently place the dough ball back in the [dusted] bowl and place the bowl in a bin bag. Leave for 40 minutes somewhere warm in which time the dough should double in size.
After 40 minutes remove the dough and gently push all of your fingers down onto it (almost down to the bottom), flattening the ball into a disc. Then reshape into a ball using the technique described above and again place in the bowl and in the bag, this time for 20 minutes. Repeat this knocking back process one more time.
Next remove the dough and divide into 3 equal pieces. Shape them how you want (long and thin, round etc) and dust heavily with the semolina. Leave on the worksurface but cover with the plastic bag and leave for 15 minutes.
Meanwhile put the oven on full whack (230 degrees in my case) and boil the kettle. Pre heat the baking trays in the oven too and place an extra tray right at the bottom of the oven. When the bread goes in you need to pour a cup of boiling water into this bottom tray. The steam this will generate will help the loaves to form a nice this crust.
The Baking
When you put the bread in the oven work fast. Remove the baking trays from the oven, place the loaves on them and with a sharp knife make about 3 scores into each loaf. Not only will this look nice but it will also help them to keep their shapes when they bake. Place them back in the oven and close the door quickly. Next careful take the kettle and pour about 1 cup of boiling water into the tray at the bottom of the oven.
Leave the oven on full and bake for an initial 10 minutes. After the 10 minutes is up turn the oven down to 170 degrees and bake for a further 30-35 minutes. Of course all ovens are different so keep an eye on them and use your judgement. The timings here are based on my electric fan assisted oven.
The Results
Well…here it is…
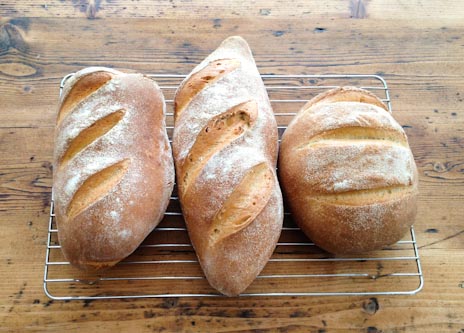
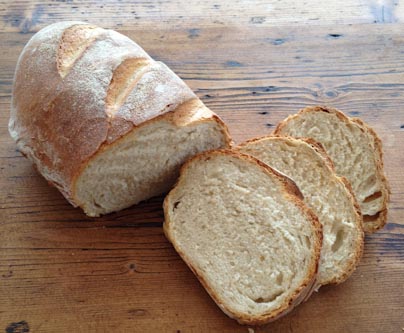
The results are pretty damn perfect i’ve got to say. Perfectly textured bread with a thick crusty crust. I’d me more than happy if i was served this bread in a restaurant or bought it from a delhi.
Of course this is just the basic recipe, you can add all sorts of herbs, spices, dried tomatoes, chillies etc just before you finish the initial kneading. I really would recommend you try this recipe, it really is as good as it looks. Let us know how you get on by leaving a comment below.