Several months back while I was dreaming of Spring to arrive i wrote about my plan to build some self watering planters to use this summer. Well, before I got round to starting the build process Father Christmas very kindly brought me an off the shelf solution….the QuadGrow…
The Basic Idea
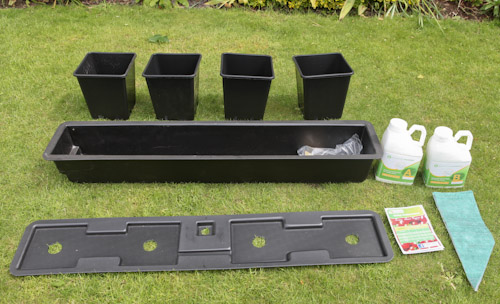
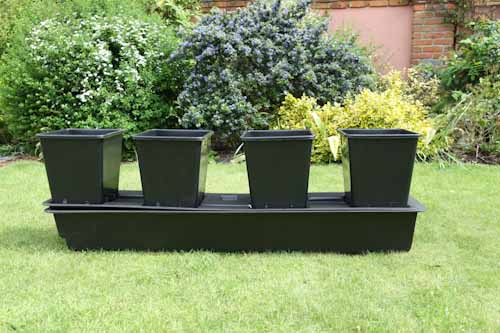
The four square pots sit on top of a larger base tank which contains the water reservoir. When potting your plants in each pot you add a wicking membrane that takes water from the reservoir below up to the roots of the plant. In addition, the kit comes with 2 bottled nutrients that are added to the reservoir to further promote growth during the growing season.
There are 3 main benefits of this type of self watering system:
- The plants receive water on demand, reducing the risk of them drying out in hot weather
- You need to water much less, only checking the reservoir levels every week or so
- Nutrients are supplied to the plants at a constant rate
Whats in the Box
The whole setup arrived in two large boxes. Here’s what was inside:
- 1 x 30 litre water reservoir & lid (L130cm x W24cm x H36cm)
- 4 x 11 litre pots
- 4 x wicks
- 2 x bottles of concentrated nutrients (makes 5 litres)
- 2 x nuts and bolts
- 1 x reservoir plug
Setting Up The Quadgrow
After doing a bit of research online there seems to be a bit of confusion about how to best set up the Quadgrow. It seems the quadgrow instructions provided with the kits have changed a couple of times and some people are unsure which procedure to follow.
Below I’ll detail the process I followed, and which caused me no issues.
1. Potting up your plants
Once your plants are big enough you need to re-pot them in to the pots provided including the wick. The wick is a long triangle made of capillary matting, long enough to protrude from the bottom of the pot down into the water reservoir.
The wick will allow the water to be pulled up from the water reservoir to the plants roots, ensuring a constant and even supply of water to the plant.
The idea is to pot the plants as normal but to have the wick extend up through the middle of the pot where the roots can access it’s moisture. I simply filled about 10cm of compost into the pot then pushed the wick through from the bottom (pointy bit to the top) and pulled it through so that the long point of the wick will end up just below the surface of the compost.
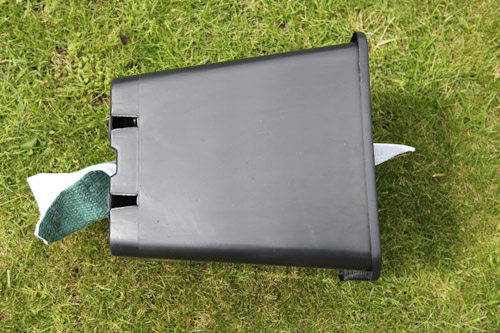
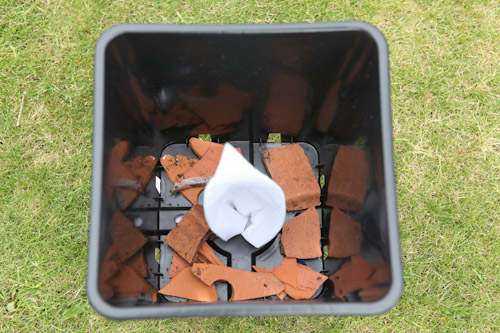
Next I simply added more compost and the plant, being careful to keep the wick as vertical and central as possible. Once the plant is potted up i firmed down the compost gently then give a good water from the top as if it was a regular potted plant. You should now have a few cm of wick sticking out of the bottom of each pot.
2. Wait
The instructions that come with the Quadgrow tell you to wait a few days until the surface of the compost is dry to touch before putting the pots anywhere near the reservoir. I guess the idea is that the wick will work best once the compost is a bit dry and the plants roots have grown in search of water. Depending on the weather and location of your plants this may take anything from a day or two up to a few weeks.
3. Assemble the Reservoir
Be sure to choose the final position of the reservoir before fully assembling as it’ll be heavy and awkward to move later on.
Once the base unit is in it’s final (level) resting place add on the lid, making sure the filling hole is in an accessible position. Next use the plastic nuts/bolts to fix the lid to the reservoir before placing the 4 pots on top, being careful to poke the wicks through the holes in the reservoir lid.
When placing the plants on the lid be sure that the wicks will be touching the bottom of the reservoir. I give them a bit of a twist to ensure they don’t snag when I poked them through the holes.
4. Fill & Add The Nutrient
With the plants in place all that is left is to fill the reservoir and add the nutrients.The first task it to fill both bottles of nutrients up with water (they come in dry/concentrate form so need diluting) and give them a good shake.
The instructions are a bit confusing when it comes to adding the nutrients to the reservoir.They say to not add the nutrients together as this can reduce their effectiveness. I took this as not to mix the neat nutrients.
I simply added alternate watering cans of water with nutrients A & B added until the reservoir was full. The instructions say to add 30ml of nutrients for each 5l of water.
Finally, be sure to put the provided plug into the the reservoir hole. This prevents any light getting in which could allow algae growth.
5. Sit Back and Watch Them Grow
With the reservoir full you can now sit back and watch your plants shoot up. It’s worth checking the reservoir levels every few days to see how quickly the plants use the water in the reservoir.
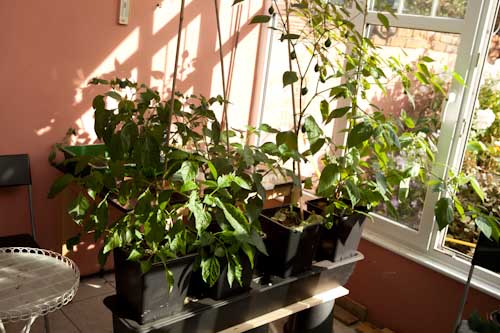
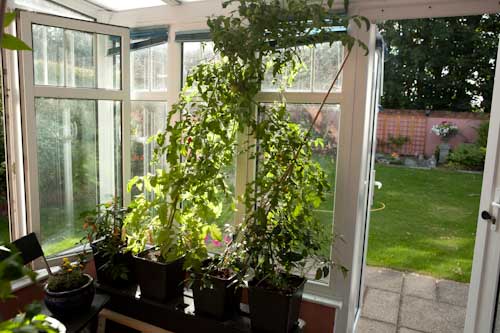
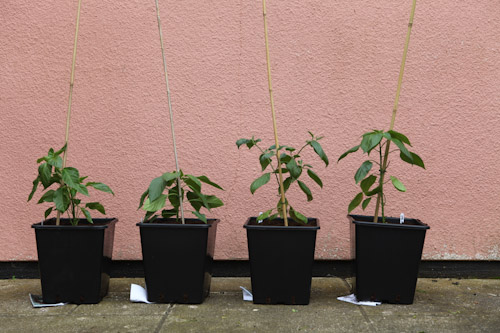
As you can see above the growth of both the chilli and tomato plants i’ve grown in the Quadgrows has been prolific and is much better than similar plants grown in traditional, manually watered pots.
Customer service
While researching chili grows I’d read a few god comments about the quality of service from the manufacturer, Green House Sensations. Unfortunately when I opened the box two of the square pots were damaged.
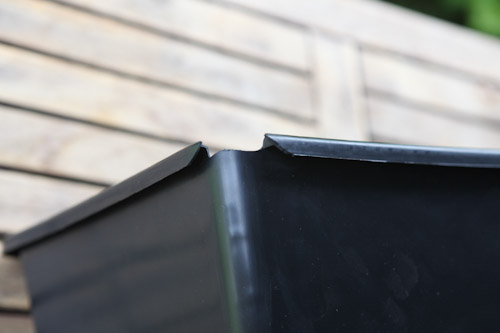
After a quick call to GS, the asked me to simply email a photo of the damage and they’d get some replacements sent out asap. They couldn’t have been more apologetic and even assured me they’d review their packaging to prevent this happening in the future. Sure to their word, replacements arrived by courier just two days later. Pretty impressive customer service.
Build Quality
Apart from the damage mentioned above the whole kit seems to be built of good quality materials. Both the reservoir and it’s lid are made from very tough black plastic. Unless they get seriously mistreated I fully expect them to last for many years.
The square pots are, just well average pots really…only with a slightly enlarged hole in the bottom for the wick. Even if they don’t last as long as the base, you could easily adapt a regular plastic pot for use with this system.
The wick appears to be made from regular capillary matting so again replacing these in future years will be easy and cheap.
The whole kit comes with a 12 month guarantee from GS.
Ongoing Watering
The beauty of this system is that you don’t have to worry about watering your plants everyday. In my first Quadgrow I’ve got two chilli plants and two tomato plants that are particularly thirsty compared to peppers. So far I’m refilling the water reservoir every week and a half, once it gets to be about half full (ish).
Every time you refill be sure to add the nutrients to the water (as described above) to ensure maximum growth for your plants.
Summary
While you can make a self watering container system very cheaply if you have the right materials this quadgrow kit is a reasonably priced, hassle free way to reduce the amount of time you spend each day watering your plants and maximizing the growth of your plants.
If you’re growing on a bigger scale you can probably come up with a cheaper DIY solution but for the average chilli grower these kits are well built and represent good value. As well as growing chillies in mine I have a few tomato plants too and both appear to be thriving.
I’ve been impressed with the quadgrow and have recently bought a kit (£90 on Amazon) as a present for a family member. I’ll post again soon about the results I’ve seen using the quad grow this season however I can say that the plants (chilli and tomatoes) that I’ve put in them have grown at a much faster rate and are yielding many more fruit than those planted in regular pots.