Chillies can be quite tricky to germinate. Some of the hotter varieties in the C.Chinense species can be particularly slow to germinate, particularly when grown outside of their native climates. In the past i’ve experienced slow germination times of up to 1 month or more. One of the key factors that affects germination speed and rates is temperature.
It is generally accepted that the optimum temperature to germinate chillies is between 23-30 degrees Celsius (73-86 degrees Fahrenheit). If you can maintain your seed’s compost within this range then you should experience good germination rates.
In my experience, given a good temperature (i aim for 25 degrees Celsius) C.Annuums (such as Jalapeno, Cayenne) will often germinate within 2-3 days while C.Chinense’s will often germinate in 7-10 days.
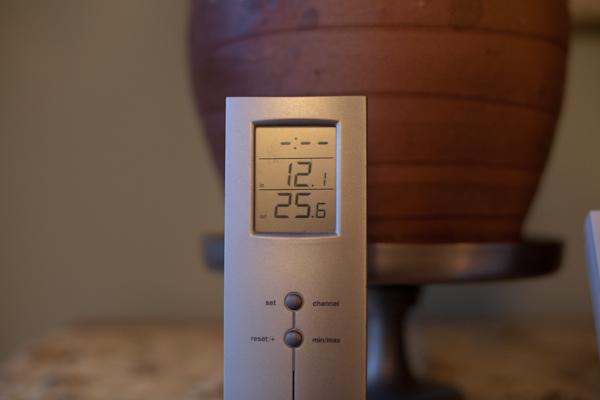
Of course there are many different ways to get your seeds up to this temperature. A regular heated propagator is one of the best, as is my reptile heat mat method. Of course if you don’t have either of these you can place your seed tray in an airing cupboard or some other place with a constant heat source such as on a satellite TV receiver, on top of the refrigerator or on a desktop pc.
Temperature Stability
Stability of temperature is another key factor when it comes to improving both germination rates and times for hot peppers. It is surprising how soil temperatures can vary, even a high end thermostatically controlled propagator. As the ambient temperature around the propagator cools (usually over night) soil temperatures can easily drop off 5-10 degrees or more. This is particularly an issue if you’re germinating your seeds in a greenhouse or conservatory where night time temperatures can fall dramatically.
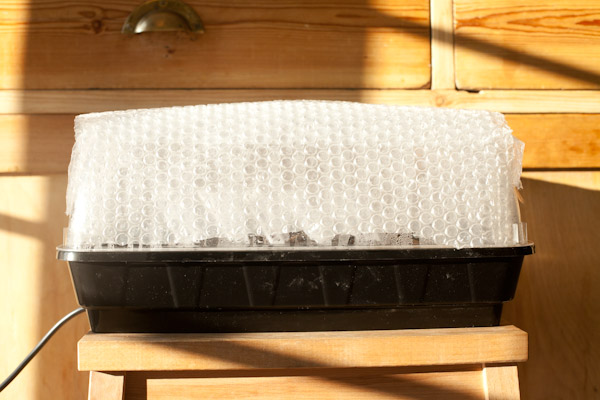
Obviously the best solution is to place your propagator in a place with as stable a temperature as possible. Personally I opt for the living room (much to my wife’s displeasure)! One other way I try and minimize these temperature fluctuations is to insulate my propagator with some regular bubble wrap. Doing so reduces heat loss as the ambient temperature drops off at night time.
Don’t forget to check the soil at least once per day as a higher temperature will dry the soil out quicker. I usually keep the propagator vents closed while waiting for germination to help keep the moisture in.
Hope some of the advise here has given you some good tips to help you reduce what can be the most frustrating part of growing chillies – particularly if you are as impatient as me!
Well it’s that time of the year when i really should have some chilli seeds germinating. I love this time of year because you forget about last years mistakes and disappointments (weather, aphids etc) and are just focused on the possibilities of what to grow this year.
I’m taking a slightly different approach this year and will be aiming to grow a few more varieties than usual, probably just a couple of plants of each variety (we’ll see how that works out though).
Here’s my initial grow list for 2013:
| Variety |
Species |
| Thai Bird |
C.Annuum |
| Super Chilli |
C.Annuum |
| Demon Red |
C.Annuum |
| Aji Hot |
C.Baccatum |
| Lemon Drop |
C.Baccatum |
| Sugar Rush (Orange) |
C.Baccatum |
| Aji Crystal |
C.Baccatum |
| Dorset Naga |
C.Chinense |
| Orange Scotch Bonnet |
C.Chinense |
| Peach Habanero |
C.Chinense |
| Spanish Naga |
C.Chinense |
| Bhut X |
C.Chinense |
| White Habanero |
C.Chinense |
| Chocolate Habanero |
C.Chinense |
| Red Scotch Bonnet |
C.Chinense |
| Brasileira Marimbondo |
C.Chinense |
| Orange Rocoto |
C.Pubescens |
| Rocoto Red |
C.Pubescens |
| Naga Jolokia |
C.Chinense |
| Habanero Papafina |
C.Chinense |
I’ll be planting most of the C.Chinense varieties throughout January and February in order to give them an early start due to their long growing seasons. As usual I’ll be using my trusty heat mat method to germinate them and then switching to my grow light to give them a good start through until the spring.
For now I’ve started off by planting some of the naga’s and habanero’s:
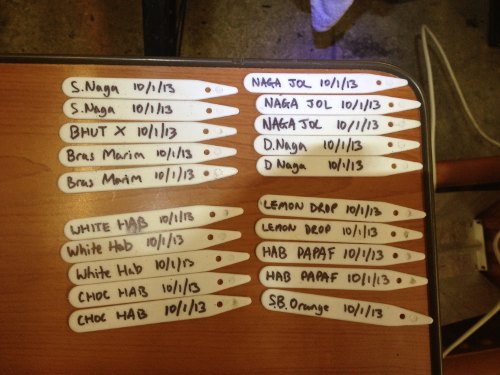
Key to the germination of Chinese’s is to maintain a stable temperature of between 25-30 degrees Celsius so i’ll be keeping the propagator in the house where the night time temperature won’t fall too low. I use a thermometer to keep an eye on the temperature inside the prop – it’s amazing how it can drop off at night if left out in a cold shed or greenhouse.
Growing Chillies Outside
I’m also going to make a more concerted effort to grow a few varieties outside this year. Previously I’ve only tended to move a few pots outside as and when I run out of room in the chilli house. This year I’ll experiment with moving some plants outside (both in pots and in the ground) in the Spring with the aim of maturing the plants outside.
Rocoto’s are well known to tolerate cooler temperatures so I’ll definitely try them outside. I’ll also try some of the C.Annuum varieties such as Super Chilli F1, Cayenne and Padron that have shorter growing seasons and may fair better outside.
We’ve got a walled garden in the South East of the UK so hopefully if we have a half decent summer (surely we can’t get worse than last years wash out) I should be able to offer the outdoor plants quite a bit of protection from the elements.
More updates on this outdoor growing venture later in the Spring. For now I’ll be concentrating on getting some of the slower growing varieties up and growing indoors.
If your chillies and tomatoes have failed to ripen before winter then this green tomato chilli chutney recipe is for you. Its the perfect autumn recipe that really signals the end of the chilli growing season for us.
Here at Chilli King HQ most of our tomato plants have well and truly past it while our chilies are still ripening – all be it very slowly. This simple recipe is perfect to use up any unripe fruit and preserve any excess harvest to eat throughout the winter.
Green Chutney and Chilli Chutney Ingredients
- 1 kg of green tomatoes
- 700g of apples
- 500g onions
- 300ml of white wine vinegar
- 5 chopped chillies
- 300g brown sugar
- fresh thyme
- salt and pepper
- 1 teaspoon of ground coriander seeds
Method
First of the above is just a base recipe that can be easily adjusted depending on what you have available. You could easily add chopped carrots, marrow, courgettes, peppers, sultanas, beans, cauliflower, or pretty much any vegetable you like.
Chop all of the ingredients into cubes and add to a large, deep pan. Bring to the boil then simmer slowly for about 2-3 hours until the vegetables are soft and the mixture has reduced down to a thick, almost sticky mixture.
To sterilise your jars place them in an oven at about 150 degrees for about 10 minutes. Boil the lids or any rubber seals in a pan for 5 minutes as these can be damaged in the oven. This green tomato chilli chutney recipe makes about 5 large jars.
Related: Do check out our classic chilli chutney recipe.