I mentioned some time ago I was thinking of building my own self watering planter. For one reason or another the project never got past the planning stage and then father christmas bought me some Quadgrow self watering planters. I was very impressed with the Quadgrows with all the plants using them outgrowing the normal potted planted significantly (check out my full review of these here).
So with the help of my father I thought I might try to make some smaller diy self watering pots that I could dot around the garden this summer.
The varieties I’ll be growing outside this summer will mainly be C.Annumns and C.Pubescens that tend to grow quicker and tolerate the outdoor weather better than some of the other varieties. Hopefully by growing some of these in self watering pots their growth can be maximized further allowing a harvest not too far of what I’d expect were they to be grown under glass.
Materials (for each container)
- 2 x black plastic pots
- 32mm drain pipe
- duct tape
- capillary matting
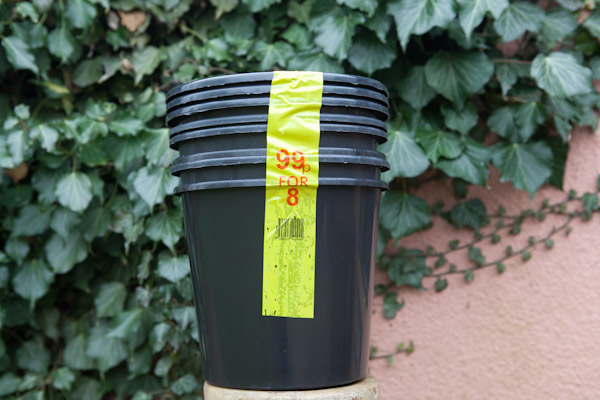
The pots were bought from Morrisons supermarket – they sell off the old pots their cut flowers come in for £1 for 8 pots which is very reasonable. Any pots would do however they must not have holes in the bottom as the water reservoir will be sitting in the bottom of these.
All of the other bits I managed to find lying around the shed so the total cost for each pot came in at about 25 pence each!
The Build Process
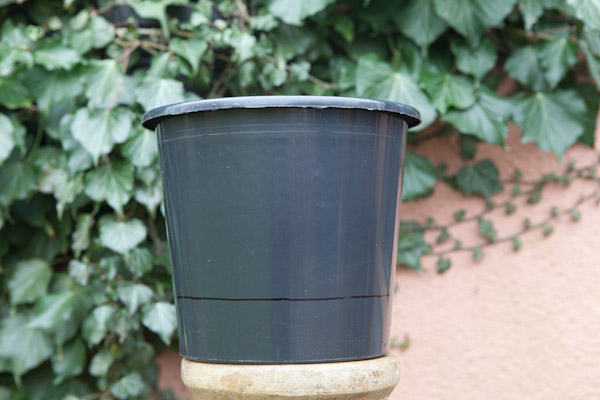
First I marked 2 inches up around the base of one of the pots and with a Stanley knife, carefully cut round the mark. This was quite tricky as the pots are quite thin and prone to splitting. Turned upside down and placed inside the pot this 2 inch part will form the barrier between the water reservoir and the soil above.
Of course the top of the pots is slightly wider than the bottom so when you try to put the barrier in the bottom of the pot it is slightly too big. To help make it fit I cut 3 vertical slits into the walls, almost to the bottom. This ensures a good fit into the outer pot.
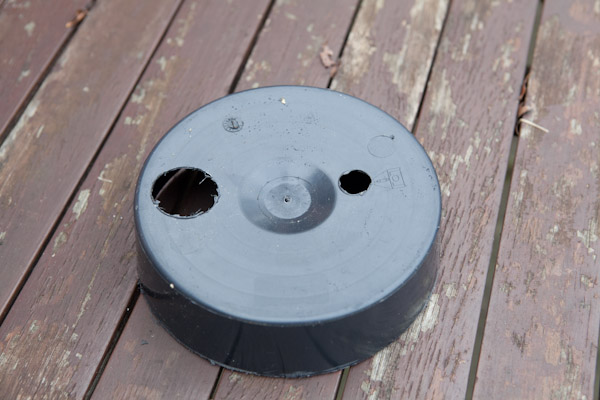
Next I cut two holes into the bottom of the raised base – one for the watering pipe and one for the wicking membrane (capillary matting) to push through. The hole for the pipe (near the edge of the circle) was 32mm while the wick hole (near to the center) was about 18mm.

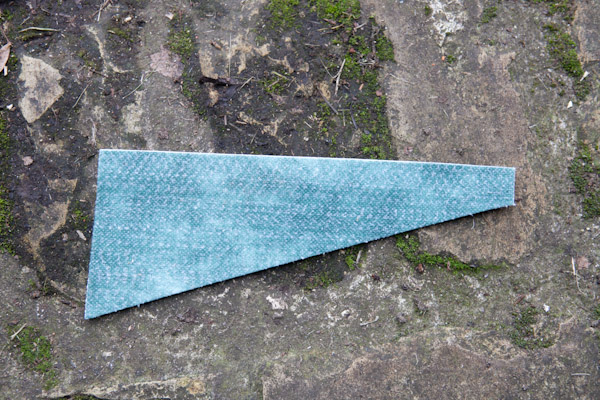
For the wick I just cut a rough triangle from regular capillary matting about 25cm in length. The thick end will sit in the water reservoir while the narrow end will poke through the small hole in the barrier up nto the compost above. As i learned from the quadgrow last year the plants roots will quickly grow around the wick sucking up the moisture as and when they require it.
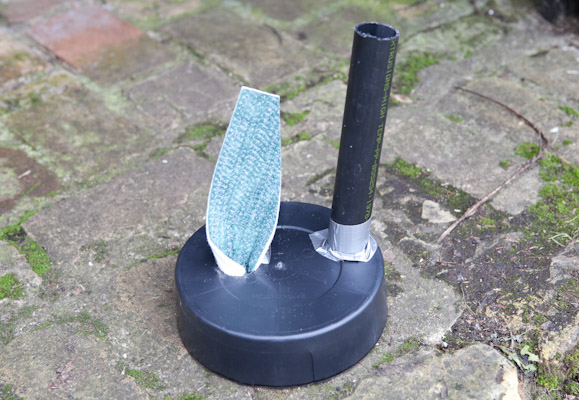
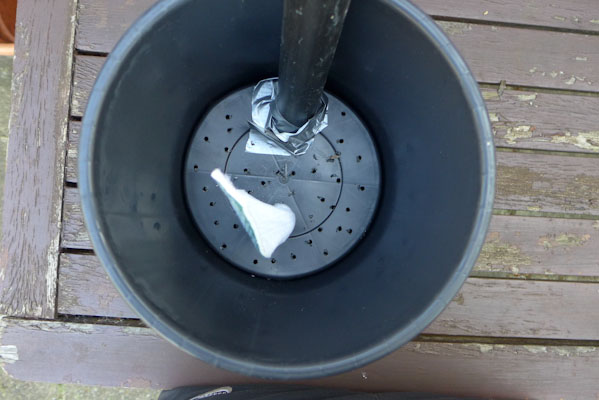
After cutting the length of pipe to 25 cm I assembled the wick and the pipe into the base. To stop compost falling down into the water reservoir I added a bit of duct tape around the bottom of the pipe. Here’s how it looked assembled ready to be put into the main pot.
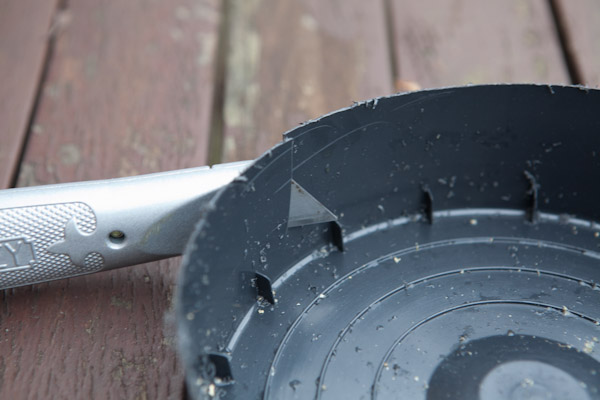
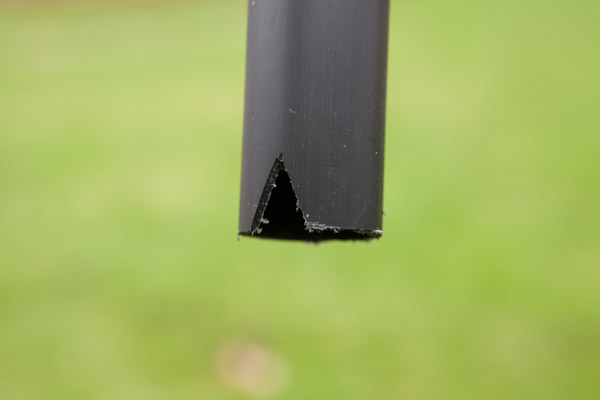
Before I the final assembly I cut a couple of small grooves into the bottom of the pipe. This will make sure the water can get through into the reservoir just incase the pipe is sitting too flush on the bottom of the outer pot.
So, after fully assembling the pots here is how they look….
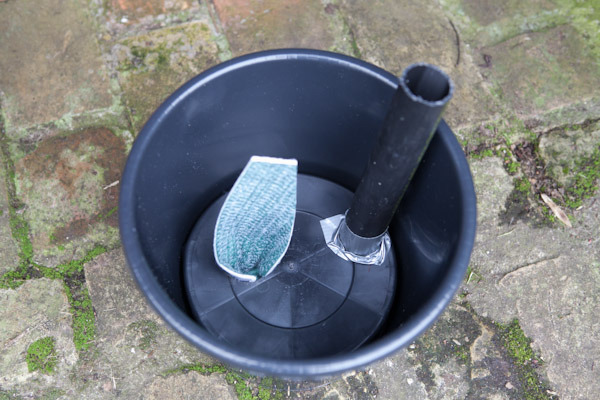
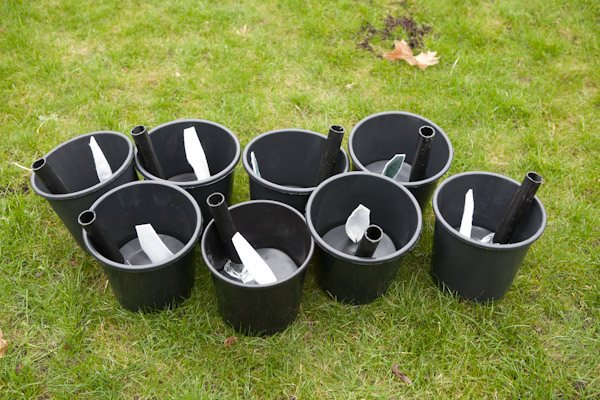
I’m pretty pleased with how they came out. They’ll certainly help to prevent any pots drying out IF we get a nice hot summer this year. As with the Quadgrows I’ll use some nutrients mixed in with the water – most likely a liquid tomato feed at half the recommended strength.
Once I start using them and the chilli plants are in place I may cover the top of the compost with black plastic to help prevent losing moisture via evaporation…I’ll let you know if I get around to that one!
Update: Since writing this post I’ve made two adaptions to this design:
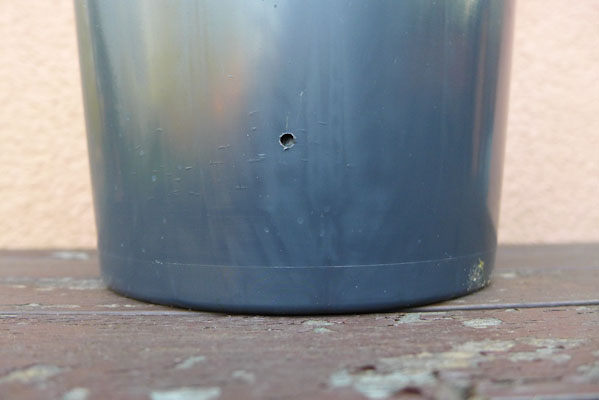
Update 1) I’ve drilled an overflow hole in the side of each pot level with the top of each of the water reservoirs. This will prevent me from overfilling the reservoirs and water logging the roots.
Update 2) I’ve drilled lots of (about 10-15) small holes in the top of each of the reservoir lids. This is to help aerate the roots and again prevent water logging.
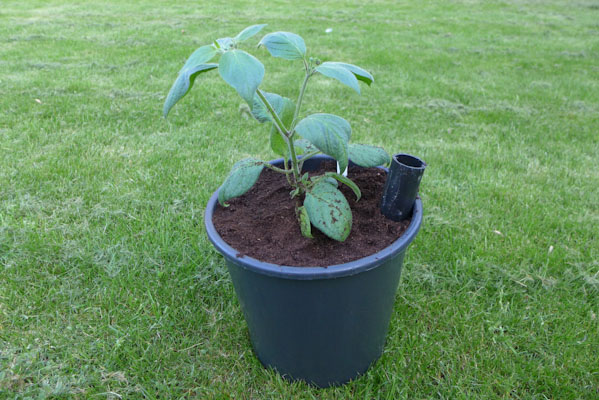
Above is the finished product. The Orange Rocoto pictured above has been thriving since it was planted up. As with other self watering pots I water from the top straight after potting up the plant. Then I leave the plant for a few days to dry out before i fill the water reservoir up. Doing so will encourage the plants roots to grow stronger and hopefully find the wick sooner once the reservoir is filled.